3 egg
1 tablespoon milk powder
Pepper
Salt
side dish :bread & cheese
separate egg whites and egg yolk
Add milk powder
Pepper
Salt
leek
Whisk until creamy texture about 10minut
-------------------------------------------
easy simple mehndi designs for hands | Arabic Mehndi Designs | latest mehndi design - Duration: 2:30.
Arabic Mehndi Designs
-------------------------------------------
Simple NPC Outfit Manager Demo - Duration: 3:38.
First, I'm going to add some clothing to equip on Lydia.
This is a mod-added outfit, but any valid piece of clothing can be equipped.
I'm also going to change her hair using an HDT hair wig.
The dialogue option to change outfits should be available on anyone who is an ally or higher.
You are given five different outfit slots to use.
Now, just deposit the clothes you want her to wear and exit the menu.
She will automatically equip the gear you give her!
I'll repeat the same process using a different outfit.
Don't mind the white miners' shirt; this is a necessary intermediate step. It's often not noticeable with less complex outfits.
Now, let's say I wanted to re-equip that first outfit we made without making any changes. Simple.
All you need to do is open up the outfit and, without making any changes, exit the menu. The outfit will be equipped automatically.
Now, I'll show you the the last feature of the mod: the ability to equip preset vanilla outfits.
I've split up the options into the kind of outfit they are: clothes, light, or heavy armor.
Just choose the outfit you want and you're all set!
Just showing the different options. Not every single one is here, but I've tried to include all the major ones.
Thanks for watching, and I hope you have fun with my mod!
-------------------------------------------
latest blouse back neck designs with borders | simple maggam work blouse designs,embroidery stitches - Duration: 2:23.
hand embroidery designs
-------------------------------------------
Do You Like Spaghetti Yogurt? | Super Simple Songs and Nursery Rhymes for Kids | Simple kids songs - Duration: 2:26.
Do You Like Spaghetti Yogurt?
-------------------------------------------
My First YouTube Video ♥️ - ( simple presentation) - Duration: 1:24. For more infomation >> My First YouTube Video ♥️ - ( simple presentation) - Duration: 1:24.
 -------------------------------------------
How To Apply Eyebrow Pencil For Beginners | Simple Professional Makeup Tips - Duration: 24:28.
Hi this video is about how to apply eyebrow pencil for beginners
my name is Melissa van Dijk and I'm a professional makeup artist and welcome
on my youtube channel and don't forget to hit the subscribe button underneath
to stay tuned for further videos and now without further ado let's get right into
this video when it comes to applying some products to your eyebrows and you
need to know how you can apply them correctly and you can also use normal
products which are already on the market for so long so you don't have to use
especially eyebrow products because you can get also cheaper ones and you might
have these already at home so I'm going to show you now step by step how you can
reach this goal but at first I like to show you what you will need to get your
eyebrows done so at first I will start with a brow and lash comb you can also
use a spoolie but it's totally up to you what you have at home on what you prefer
I'm going to use this side right here for my eyebrows then you will need a
brown eyeliner or just a normal eyeliner in your shade which matches with your
eyebrows so I have this one in a dark brown shade and the cooler the tone the
better your eyebrows will look afterwards so if you have like orangey
reddish brows then just keep it to this shade but if you have brownish blonde
brows then always make sure that you have a grayish undertone to it so that
it looks a little bit more ashier because this will give you a natural
look and if it looks too warm then it can look a little bit strange I'm going
to give you a swatch about an eye pencil that it's cold tone and an eye pencil
that's warm toned later on then you will need an angle brush and also some
concealer to clean up any mistakes which you will have
get later on if you are not sure how to do it and also an sharpener to get a sharp tip
to get also a nice job done I just swatched to shades on the back of
my hand so that you can see the difference so this one is a little bit
darker but it's a little cool toned and this one is more lighter and it also has
this earthly turn to it so it's a little bit more like a brownish orange shade so
I'm going to take this one right here but not that dark and this one will give
you a better look later on than this one so if it's cool toned if it has more
like a grayish and also if you can see the cold in it then this shade right
here is better for you and if you are using this one right here then it can
look unnatural and this is what I meant when it has a cool toned underneath and
if it has a warm turn on it so just keep this in mind and be careful if you are
using one of those shades for step number one you're going to take the lash
and brow comb or spoolie so it's totally up to you it will do the same thing and
brush through your brows so I'm going to choose this side right here and this
side is for the lashes so I'm going to take the brow side and I'm going to brush through my
brows so that they are in shape and then I can focus later on where I'm going to
just get the three points right so that I have the perfect brow shape later on
so it's really important that you can get them in shape so that you can brush
through them especially if you have applied the foundation also a little bit
on top of your browser so that you will see your actual color if you need to you
can also sharpen the tip of your eyeliner and it's so important that you
have a very pointy tip because then you can get also some hair so you can draw
on some hairs and it will give you also better lines and also a better finish so
this is also essential don't do it with just rounded tip because otherwise you
can just mess it up a little bit more for the next start we are going to
measure the three main points so that you know where your brow should start
where the arch is and where it ends and for that you're going to take your
angle brush the thinner the brush the better and your eyeliner well your brow pencil
and then you're going to measure at first where it starts so where your brow
should start for that you're going to hold the brush against your nostril
straight up so that it crosses your inner corner of your eye so like this
and as you can see my brow starts exactly where the brush is and also
where it belongs so that it just goes along the inner corner and now I'm going
to do a little dot right here so the dot just needs to be visible for
yourself so that you know where the brow should start now we are going to measure
where it should end and for that you are going to take the brush not where your
nose is right here but where the crack is so where you're winging exactly is so
like this and it should pass the other corner of your nose so I need to look
down so that I can see which will be for myself so like this so it should go
along the other corner of your eye this is where your brow should end.
so I just made the dot for myself so that I can see it later on you can't
just take concealer and just wipe it away so that you won't see it anymore
this is just your mapping out whether your brow shape should end, start and where the arch is
now when it comes to the arch you're going to hold the brush again
right here where the wing is and it should cross your pupil so I'm going to
look down so that I can see it for myself like this
and I'm going to do a dot right here even though it's now a little bit higher
the dot but I still know where I should do the arch now these are now the main
three points and now you can start to fill in and also create your brow shape
now step number three you are going to take your spoolie again or your
lash and brow comb and you're going to brush your hair brows down so that you
can start creating the shape for your brow but just well I'm not going to do
it in the front part the front part will be my last part well my last step and my
last part which I'm going to fill in so I'm going to focus on the middle and
onto the brow tail so I'm going to brush it hand downwards and now I can start to
create a line so this is where my arches and this is where it ends so I'm going
to start right here but still where my natural brow has are
so if you have very thin brows you can just over draw it a little bit but I
wouldn't do it too much because otherwise it look it will look fake so
we still want to keep it quite natural and if you have very thin brows then
don't overdraw too much because otherwise you will look a little awful I would say so I'm going
with my natural hairs I'm just going to define them a little bit more so I'm
going to create a straight line right here until the point of the arch now you
always can take your brown lash comb and brush it into your brow hairs so we want
we don't want to get a very strong line we just want to keep a shape to it
little strokes will be the best like this now we can move on to the end
so when I just draw my point on you I know towards the end of my brown
tail like this so we are going to create a shape and as
you can see this is now where I have no hairs but this is where my actual arch
should be so I'm just going to over draw it a little bit not too much and later
on we will do the other thing the lower part right here and then we'll brush the
hairs up but for the moment it will look a little bit strange but you always can
take your brush and broke home and spoolie to just fade the color a little bit
so and now we will move on to the next step
now for the next step we are going to focus on this line right here so now we
are going to brush up our hairs with the spoolie or brow&lash comb and we are
going to define the lower part too as we did on top so we are going to brush them
up and now because you know where the arch is you know exactly where you
should stop so I'm going to start kind of in the middle just before the first
three or four hairs which I have for now I'm just going to draw a line and I keep
the line straight so I'm not going to do a curve in it but I keep it straight and
straight so I'm going to start right here in my brow hairs
and then I always can take the coob again and brush the color into my brown
hair so that it isn't that hard anymore
straight line now we are going to focus on the tail and I'm going to match up
with the last hair which I have right here
you always can get the color mixed in with your natural hairs
and later on we can do a sharp point at the end but this is now my main point
where I'm going to focus later on we can map it out a little bit sharper but as
you know as long as you know where the brow should end this is the point where
you know that it's long enough or it's short enough so it depends on your eye
shape and also on how big your is but this is now good for me so I'm just going to keep it towards the end
you can go a little bit more intense at the end at the brow tail but just keep
it softer in the middle of your brows and especially in the front of your
brows so now we have created also a line on the lower part and now we can move on
to the next step now for the next step we are going to fill in our brow part
like the middle where your actual brow hairs are so I'm going to take the lash
&brow comb again and I'm just going to brush through them so that they
are in place and as you can see my brows are having a little bit of a different
shape so just you know this point right here because I'm going to cancel it out
later on with some concealer but this is still my point where I should be careful
and also be aware where my brow should end so now we can fill in the middle
part now we just can't take the eye brow pencil and just do little strokes and if
you need to like this area right here I'm going to fill it out a little bit
more just do little strokes
and then you will see that it would just create automatically a little bit more of a
sharper line right here now always take the brow and lash comb or a spoolie and
brush the color through your actual brow hairs so that they will mix in with
everything together so that it won't look that harsh just on one point and
now with my arch I'm just going to define my arch a little bit more because
there's where I'm missing some hairs
so now you can start filling in the areas where you need to and it looks a little bit
messy around but it also depends on how creamy your pencil is so if you have
a very stiff pencil then it won't look that smudgy but if you have a smoother pencil
like I have which I also prepare then it will really melts in with your actual
brow hairs which I personally really like
so now we have created a really nice brow tail
and now we can move on to the front part when it comes to the front part as you
can see I have my hairs which are going straight up so I'm going to follow the
same shape as they are but if you have like more fluffy hairs and they aren't
really in shape and later on I will share a tip with you how you can get
them in shape but for the moment I'm just going to take my eyebrow pencil and
I'm just going to follow and do little strokes like my hairs are in the front
so I'm just going to do a harsh line in the front because this will look
unnatural so just keep it well I'm doing my strokes to fill in the front area and
where you have spare areas you always can fill it in with the pencil and I'm
always going to use my brush and lash comb to get to the hairs and these will also
automatically fill in the areas where I need to use a little color so now for
this part right here today a little bit more over line I'm just going to
slightly really light-handed creating a line and I can brush with my
brush with my brow and lash comb through the hair so that it will look a little bit more even
and this is really good if you have a very soft and also creamy
eyebrow pencil because if you have a very stiff pencil then it won't mix
exactly like you want with your brow hairs so I really don't need to use that
much I just can't keep it very soft and just really light handle to brush
through my hair and if you need to you can also wiggle like you're with with
your mascara so that your eyebrow hairs are really coated with the eye pencil well
with the eyebrow pencil
like this and now we can move on to the final point and this is where you can
clean up any smudgeness around your eyebrows just that you can get a very
sharp eye brow look now when it comes to cleaning up your eyebrow well around
your eyebrow then you can take your angled brush which you used before to
map out where your brow should start and and where the arch is and you can take your
concealer so the concealer will cancel out any mistakes which you have done
or any smudgeness like I have around my eyes and you can also cancel out the points which
you have created so now I'm just going to dip in a little bit into the
concealer I can start cleaning my eyebrow shape so now that I know where
it should start and then where the art is I know where I should cancel it out
where there is too much so now let's start with this part right here so as you can see
it has smudged quite a lot because I also brush through my hair and I'm going
to clean up with the concealer and when it comes to clean the cleaning up with a
concealer always just use the back of your hand as kind of or just use a towel
or a tissue where it just can get rid of any color so that you want just mess up
the rest of eye makeup look or your face
now we can just sharpen also the end of the brown tail and don't use too much
concealer because otherwise you aren't able to blend it so if you have done
already your eye makeup and let's say it goes like this then don't use too much
concealer just work it into the skin as long as you can blend it out because if
you have used too much then you just need a little bit more space where you
can blend it out and if you have already your beautiful eye makeup on then you
aren't able to blend it out so this is what I like to suggest you now for
the brow tail I'm going to just use it exactly where just created the line
I'm also cancelling out the dots now with no product I'm just going to wipe the dot away
and then I like to use some concealer on top
to create a very sharp line right here
you can also use your finger to wipe it away
but you really need to focus on where you really need some concealer
now we can focus on the front part
so I'm not doing any curves I'm just keeping it straight and then I can turn
a brush to blend it into the skin
so just do this side again
like this now we can move on to the top part and there we'll do the same so I'm
going to really just focus on where I need to clean it up and with an angle
brush you are really able to focus and create a line as you did with the
eyebrow pencil and now I can turn the brush and blend it into the skin
now where the arch is I used to well I just use a little bit more eyebrow pencil on
the top where the arch is and I'm just going around it
so that I still have the area where I've filled in the missing part
so now for the front
now blend it out if you need to you can also use this part right here but I
haven't really smudge the front part right here so it's not really essential if I'm
going to use little bit of product right here but it's more like a brow tail which
was a little smudgy and then you still can go in with your brow and lash comb
and go once again through your brows and if you are happy with the shape then we
can move on to the last thing to keep your eyebrow hairs in place you can take
your spoolie or your brow and lash comb just wipe the product of it off so that you
have a clean one and you can take some hairspray and now you can just set them
with some hairspray and just brush through them so that they will stay in place
all day long so I'm just going to take some hairspray on the brow side right here
and now I can take my mirror and just brush through them so that they will
stay where I want them to stay so if you are very fluffy eyebrows and you really
will need to get this done and then they will also lay down
like this
and this is how you can just use a little bit of hairspray and get them set
for the rest of your day so you don't have to worry about that they are going
to just curl them back at the well where they just used to be and now they just
will stick well on another and then they won't move so now I have done also the
other eyebrow part and I filled them and as I said before step by step and also
the same way I filled this one in as I did on the other side and when it comes to
get them even and it takes practice and it also depends on if you want to
create for like a fake eyebrow and also an unnatural or if you want to
create a natural eyebrow so your face isn't symmetrical and for example this
eye also higher and this eyebrows are higher than this one on my face
personally so you always have to see what you want to create and your baby
won't see it until someone tells you that you have this eye higher or this
one looks a little bit different than this eye and so on so it's all about
getting it symmetrical is nearly impossible it's it's possible if you are
using or if you are spending a lot of time with your eyebrows but if you have
a lot like I have then you are happy with your eyebrows normally and you
don't exactly want to fill them in every time you're doing a makeup so it also
depends on how thin your eyebrows are if you have very thin eyebrows you always
can add more and you're a little bit more flexible on how you can create a
shape if you have thicker brows like I do then you just need to play with it
what you have because you don't want what I personally don't want to tweeze
around my personal eyebrow shape because I'm happy with the eyebrows hairs which
I have so I'm just going to twist a little bit on this part part here and in
the middle and then I'm done so it also depends on
how your eyebrow looks like when it's natural and how many hairs you have and
if you have thick or thin eyebrows so if your thin eyebrows or if you have shorter
eyebrows you can play around with so many different shapes if you have thick
eyebrows then you can tweeze them but I personally wouldn't do it because then
you always have to retweeze them a lot because you will see the growing hair
around eyebrow shape so that's what I can tell you what my experience and now
as you can see that I'm done with my eyebrows this is now the finished result
of it if you want you don't have to use an eyebrow pencil you can also use
powder or you just can use an eyebrow like gel and just brush them through it
so it's always what you prefer this is now how you can create eyebrows well
create our brows with eyebrow pencil and just hope that you like it I hope that
this tutorial was helpful for you and if you still have any questions then let me
know any comments section and don't forget to give it a thumbs up even
though it's on YouTube and share it if you feel that it's helpful for you and
try it at home and let me know if it works for you and if you wanted them
going a little bit more in depth and just let me know I can still do another
tutorial about it and thank you so much for watching and if you want to know how
to fill in your eyebrows with eye shadow or with them some brow powder this is
right here and if you want to subscribe to my channel this is right in the
corner thank you so much for supporting me and I will see you soon bye
-------------------------------------------
How to Make a DIY Ring. Simple Handmade Ring from Beads. - Duration: 11:08.
Hi my darlings!
I am very glad to see you on my channel again.
This video is about
how to create a simple and dainty ring.
If you remember, I already made earrings
and bracelet from the same materials.
If you have not seen them yet,
I leave links to them in the description.
Also don`t miss next tutorial
where I will show how to make a haircomb.
Don`t forget to put your thumbs up,
I will appreciate for your subscription and comments!
And now let`s get started!
Fold in half a 0.5 mm wire 60 cm long
Slide a 3 mm crystal bead onto the wire
Twist the bead 10 times
Twist 2 more branches
Twist 3 small branches
Use 6 mm beads
Continue to add beads and twist the wires
Work with two wires
Twist the wires several times
Apply super glue
Take a 0.4 mm wire 80 cm long
Add a 4 mm bead
Place it in the center
Attach the wires at the bottom of the flower
Add an acrylic flower into the both wires
Take the ring base
If necessary, remove excess loops
Fasten the flower on the ring base
Fasten a 70 cm-long wire
Twist branches around the flower as shown in the video
Fasten a 60 cm-long wire
Add 10 bugle beads and 9 crystal beads
Wrap the wire around the flower
Done!
I think the ring is very pretty and comfortable!
You can wear it on different fingers
because the ring will fit to any size!
I wish you creative inspiration and beautiful works!
Subscribe to my channel,
see you soon!
Bye! :)
-------------------------------------------
Iedereen kan haken© How to crochet the Misteryscarf, simple with dc and chain. EASY! - Duration: 24:23.
Welcome to "everyone can crochet" we are going to have a beautiful scarf today
I have this wool..I have ordered again at Ali Express, or again .... yes I look
always just what I like and what I can do pay and yes it is the rainbow line
there are 6 and the price ... I know no longer I've been in it for a while
House but it feels very nice and soft
and I'm going to make a scarf so you see without a label? How beautiful the color is? and here
do you have it with green in it and yet this was a package so well
we're just going to make a scarf, it's going to be sticks and unloading and getting complicated
it is not, it is just fun and then we start and I go a crochet needle
figure out, but then I see you again back
and yes first I want you for a moment thank you very much !! for looking at
"everyone can crochet" because yes, the subscribers go up .... (I mean: the number haha) and that the look
numbers, yes .... a bit weird, but I want just just explain videos
I'll explain about hooks, and I'll find out through the videos, I think so too
really nice to do and yes I am also fond of wool and the
colors and on the crochet stitches and if so ... also everyone learns from themselves
me too! because some things that I make become again with other wool and others
crochet hooks used, but well I go just find a crochet hook and then see
I'll be back to you again.
I .... yes I have already started as you see but I would pick out a crochet hook
have crooked hook no the rainbow line
wool, and I'll look a little further or I can find more information
here is 100% import wool
yes he is from: the AliExpress, you therefore need crochet hook nr 4
an inch and a pair of scissors and I'm going straight away just measure because I have about 65
stabbing set up and he is divisible by 6
and I have 25 centimeters and then I will just measure how far I have hooked, because I
now have a ball crocheted, measure approximately, 24 centimeters by 45
centimeter, so you crochet about 45 centimeters, for yes a ball
I think they are per 6 packaged
it is really a nice rainbow color! Look how beautiful that stitch is and he
is real lazy easy, easy, easy, it
is yes ... chopsticks ... unloading ... and sticks ... and unloading again ...
but I'm going to explain it very calmly (I try) and I have another one at the end of the video
surprise I have a label of myself
it is not mine but I will later the e-mail address
put here under the video so that you can order the labels yourself
I'm going to do a "give away" on Facebook so you can win those labels
but we are going to make this fun #mystery scarf a real easy first
scarf he is really yes I just think very beautiful and because I now with one
I'm ready, so I start with one new ball and the stitch is divisible
by 6
so you can yes I have set up 65 stitches here but
it is fair it is fair divisible by 6 so the 60 and we start
now 60 plus 4 stitches, you have to Setting up
do you want to get 64 stitches on these dimensions and then just release them like you do
a loose does
I put the scarf away and then you can do it still see better
1 2 3 4 5 6 look, because he is divisible by 6,
that stitch, you do every 6 and 6 and do that you then ten times
so this was the first time of a two three four five six
this is the second time 1 2 3 4 5 6 then I see you back at 60 and then put it
we still have the four for the setup loose, stick, one more time 1 2 3 4
5 6 and if you are at 60 plus 4, then see
I'll get you back and when you're at the end are from those six times they
yes it ten times 6 then you still do 4 loose ones there and that is your stick
two three four here you start, in that 4th stitch, 1 stick
that is your first stitch then we will go one skip two three four five and
in the sixth, there we go another stitch Bet
and now we need 4 sticks in the same make sense, so add another 3
this is the 3rd
and this is the 4th
then we will do two separate, so you put 4 sticks in 1 stitch and then you do 2
doing things separately, we will go into the next step
Immediately afterwards you will again take a baton
then you go two loose again, and then turn you are again 5 over a two three four
five and I the sixth
there you will add another three sticks in the same stitch, so 4 sticks
the same stitch
then release two and then another stick in the next stitch, then two loose ones
you can not forget and then you go again 1 2 3 4 5 skip and in the 6th stitch
there you plug back in and then you go again 4 sticks in a stitch ..
then two unload and then in that next again stick a stick then two again
unload and then again, you strike 5 stitches again about 1 2 3 4 5 and in the zeste
there you put 4 sticks again
then two separate ones in that next again stick a stick
I'm going too fast ... you can always play the video
slow down and you can also do the turning on subtitles look above
are three dots and there you can do the turning on subtitles and making the
complete tour and in the end I see you back again....
and we are now at the end of the tour, and I will end now to explain
Look ... I come here on a two three four I would have to put in five six
but I have the two here last one last last, there
make those 4 sticks
then you make two unloading again and then you do it again
a stick in the next stitch and that is then your last stitch, then you go up again
with four unloading, then you turn your work, you have to it will look like this
well every tour, you just have to take a look whether you neatly two loose everywhere in between
have done, but once you get used to it are on this stitch, you then it is just
super fast !! making sticks because you have to immediately ...
Immediately see it ... you enter into that big loop every time
so you do not really have to get stuck so the first stitch in the second round
plug into that big one, this is always the beginning stitch, then two unloading and
then you skip this all the way ... until you in this opening are ... and that's where you go
that seems weird in the beginning but go there use 4 sticks in that big one
opening there you put four in, a two three moments
again
4, then you make two unloading again and then you go back into that big one
opening you put one in, one more stick
and then you go two separate and then you go to the next opening,
this opening
there you put 4 sticks again
then again two loose and then another stick in that large opening, then 2 separate ones
then again, you skip everything again and then you go again ...
working towards those big openings there you will again use 4 sticks
just take some yarn, oh the box goes aside, I found that cute
then 2 separate, then again in the same opening
again a stick
then again two separate 1 2 and then you hit this all over again until you are in that
big opening and there you put again, a stick and
that will be a total of 4 sticks 1-2-3
4, then two separate ones
then again a stick in the same opening and then two separate ones
then we are here at the end, yes I have a slightly narrower tie, made naturally
but then we are here at the end of the last ... or of it
yes .. from the first tour, there we go
seek that opening here here we will put 4 sticks again
the last is that every tour is the same, up the end always has 4 sticks
2
oh I'm going too fast
three four, then two loose ones
and then again a stick and this is the stab but I'm going to be a bit quieter
explain, we now go up four separate one two three four
you turn the work
then you turn around again, you go into that big one opening
you pick up the thread, turn the two turn around by 2
it is a stick to turn over again watching ... am I doing well? than
excuse me! this is the outward tour, So you only need one stick here
to do, so the outward tour 1 stick and do 2 loose! (I did not explain that correctly, sorry)
you always start with this ... and you end up yes, I will tell you that right away
so you start with a stick in the big one opening then you go straight to that
big opening
there you put 4 sticks again
then you go with two unloading, and then you put another stick in the same opening
so you always start the tour here, with yes, in the end, if you solve four, you will turn it
work and then you put a stick in it start in and then you continue, well again two
loose, then you just follow the pattern 4 sticks each time
two unload and again a baton the same opening and then again two
loose, then you go further in this opening
look equally well that you are well-placed and otherwise you just open it a bit
that does not matter with hooks, first turn over, then again 4 sticks 1 2
3 4, 2 unload and turn again and again the same opening so yes
again a stick, then another loose one you see how easy this stitch
and how nice it is with this wool, I must say, it is ...
I will take the example, watch this is the example
yes, fantastic! how beautiful that this, yes jumps like that .. those sticks like that
and those sticks like that ... and it's one of them easy pattern and I mention this
scarf the mystery scarf, just because English is also very
much is asked and I am doing my subtitling videos and then you can also
yes by referring to these three points here click and you will see the sub
titles so the subtitles and then I do it
in Dutch and then I turn it on automatically
translate and is useful because yes you naturally also looks at
other videos, just see if I do 1 2 3 4 2 loose and a stick
and done two separate things again, and I am already with the last one
and that is important, look at the latter pull out a bit like that
indeed here the those four loose ones and one baton, then you turn back and go
the last one just push those 4 sticks in that opening is the end of the tour
always the 4 sticks 2 loose and still 1stokje in that same opening
and then you go up again with four loose ones then you turn the work, I'll go on
continue to hook up with you, but I'm going too a little something that I think of "myself"
I got it and I returned to you I have just noticed an envelope open
from "myself" and there is a nice card at: Hello Monique, have fun with this one
nice guys :-) we call !! Joyce, look and this is from these are labels
of myself and mez11, well ... I'm old
so I thought it was a little uhh .. how do you read this? They are labels of myself
but below I will put the link, so you go straight to
the website and open it up
Just empty the bag. This is a label for a thicker blanket, you can win that
i have this explain on facebook how that you can win it..ach and this..with one
a kiss on it! yes, she invents (designs :-) it is nice ohh !! in front of
a boy! see if in a heart handmade with love ...
yes they are very nice leather labels
oh..of this is nice to find the scarf I'm a little bit small
owl up, again made with love ... and here is a bow tie, yes I think
these are very cute! but this one is also very beautiful, I just have
made a blanket "fasting in pairs" (with the Royal) I will link this
put label under it as well you order it, and then we go again
continue with hooks because we are in any case with that
busy ... Oh ...
there the camera went almost (haha)
we started here again, at the beginning with a stick in it, so that's only one
stick
two loose and then you go back to the next opening
yes and you know this, you really have to be fine the opening does not take a stitch, really
the opening this you know ... this is just 4 sticks
and two loose and again a stick the same opening
two loose and again in the next opening
4 sticks
fluff goes off, and again two loose and again
a stick two loose and you go back to the
next opening, I will take him there so you can see it again
result, then I put this away
the result is just a wonderful one badger, but of course you can do everything here
experience if you want a different size, or a sweater or a pillowcase you or
yes, I'm going to wear a dot scarf again but this is the #mysteryscarf
and do you like this video, please thumbs up! (thanks!) and subscribe to this
the button ... Thank you very much for watching n until the next video!
-------------------------------------------
$70k in Passive Income in 2017 with a SIMPLE Amazon Affiliate Niche Site - Duration: 16:14.
so this is a little crazy in 2017 I had a simple niche site and it made $70,000
my name is Doug Huntington I'm the founder of niche site project and I talk
about Amazon affiliate marketing internet marketing in general and
project management because I'm a project management professional let me tell you
about this site so this site made seventy thousand dollars in 2017 for
some set of people it's enough money to live for a couple of years for other
people it may not be able to replace your full-time income or provide for
their full household but regardless for most people seventy K that's a good
chunk of change now let's rewind let's look at 2016 and I
want you to see the growth that we had there so this site made $100 in January
of 2016 and by the end of 2016 December the site made almost $15,000 I
think it was like fourteen eight hundred or something like that so pretty solid
and I shot a couple other videos where I explained what I did in the year of 2016
but basically I added a line of content I added about 200 articles that were
keyword golden ratio compliant and if you're unfamiliar with a keyword golden
ratio it is a data-driven way to find keywords that other people aren't
targeting it's literally like the supply and demand of keywords it's a
mathematical formula and it's deeper than what we're talking about today so
definitely be sure to check out the link in the description to learn more about
the keyword golden ratio there's actually a playlist that sort of walks
you through the process I go through a demo and everything so check that out at
a high level you use a specific search in Google it's called the all-in title
so in the Google search bar you type in all in title colon and then you type in
your search phrase right so let's say it's like best ballpoint pen for
journaling something like that you type in all in title colon best ballpoint pen
for journaling no quotes nothing like that just type it in and it'll give you
the number of results that have that phrase in the
title hence the name all in title so it's pretty easy to do that search but
finding keyword golden ratio content is a little more difficult because the next
step is you take that on title and you divide it by the local monthly search
volume the local monthly search volume should be one hundred two hundred and
fifty and you want the ratio to be 0.25 or less so you went the kgr keyword
golden ratio to be below 0.25 so I added a whole lot of that content 200 posts or
so and that was over the course of five months I invested right I spent about
four thousand dollars on that content but as I mentioned the revenue went up
from a hundred dollars in January to almost 15,000 in December obviously it
was a good investment and I was able to essentially reinvest the earnings
reinvest the revenue into the content so I never had to outlay the cash
specifically I just reinvested into the site now fast-forward to 2017 you can
see the graph here where earnings were pretty consistent at least four thousand
a month and it got higher as we got to the retail season you will notice in
March there is a drop right so the thing that happened then is Amazon change that
of commission rate structure so everything with a commission rate
changed and just at a high level my Commission's went down by about 34% or
so by one-third so that is the reason that earnings went down a little bit and
you know there's nothing we can do about that Amazon had to make a business
decision and we're working with an ecosystem I'm grateful to be able to do
it so if they made the adjustment it's something I have to work with luckily I
kept adding content and was able to keep increasing the revenue so that said when
we look at how much this site was earning so you can see the 2016 and 2017
earnings when we look at the expenses we do have a couple things to consider
right so a lot of times you will see people say they're making twenty thirty
thousand dollars a month top-line revenue but it's really important to
understand your expenses top-line revenue is
certainly interesting but if you're spending you know a huge chunk of change
your margins could be left this is actually one of the reasons why I love
the affiliate program from Amazon or you know any other place but if you are
doing like a physical goods business like an FBA business that's fulfilled by
Amazon or drop shipping or something your margins are going to be lower
because you're actually buying like physical stuff but with the Amazon
affiliate program most other affiliate marketing your margins are really high
so here are the expenses in 2016 I spent about $4,000 on content and in 2017 I
spent about six thousand dollars in content the other big thing that you
have to consider is hosting so as my site was growing I was getting more and
more traffic over a thousand visitors a day sometimes up to three thousand
visitors per day that sort of traffic needs to have better hosting than the
cheapest package that you can get right so at some point I realized my site was
a little slower sometimes it would crash so I knew I needed to upgrade my hosting
so that said I upgraded my hosting when I got about say 1200 to 1500 visitors a
day I upgraded my hosting so I was paying a little bit more actually a
considerable amount more so I was paying about 25 bucks a month and I went up to
125 bucks a month I kind of look at the pricing packages because each hosting
company sort of they have a different offering so if you look at what you're
paying and you look at you know other companies then you can sort of make a
decision based on the price points so I find that when you start out maybe
you're only getting a few hundred visitors a day you're on a shared
hosting plan then you can move up to what they call like a semi dedicated
hosting plan where you're maybe paying 25 bucks a month but I would say that's
probably good from 300 visitors a day to about 1,000 or 1,200 visitors per day
and then once you're getting you know more than that you know say 1200 or more
you'll probably need to move over to a hosting plan that you know maybe you're
paying $100 250 a month and I would hope if you're
getting that much traffic you're able to monetize it and that is you know just
the price of doing business because you obviously need to be able to serve the
website you need a stable environment so it's definitely worth it to upgrade the
hosting that is one of the big expenses that a lot of people won't talk about
over the past two years I've invested about ten thousand dollars in the site
has obviously made way more than the ten thousand dollars and we look at 2017
that means the profits are still you know well over you know sixty thousand
dollars again that's pretty good for business that I only spent a couple
hours a week on let me go over the details of the site with you so a lot of
people ask about you know how I have certain things set up and stuff like
that so I'll tell you about it here now I won't reveal the site that's just not
my style I've seen too many of my friends get their sites hit with
negative SEO and just have basically a bad outcome with any sort of public case
study other people do share their sites and if you're interested in that sort of
thing you know check them out I know the income school guys share their site so
if you're interested in that sort of thing you want to see examples you can
you know look at their case studies as I mentioned I published a pretty good
amount of content on the site there are over 300 posts on the site how long are
the posts you may be thinking they're about a thousand words each for most of
them however there's a small percentage probably about you know 10 or 15 of them
that are much longer they are anywhere from 2,000 words to 15,000 words if you
are thinking no one's gonna read 15,000 words you could be right but it turns
out from an SEO perspective it's actually a very good thing to have a lot
of words on the page a lot of images and captions the more words you have on the
page the more opportunities you have to rank for longtail keywords so for the
most part most of the articles are a thousand words or so there's just that
small subset where larger search volume term and I know I need
content there or maybe it just happens to be a post where there's a lot of
information available at a lot of products and I found that you know
having more words there can be helpful the other part is how much traffic is a
site getting per day per month and that sort of thing so on average it varies
right so most of the year that the site's giving 1000 1500 visitors per day
over the retail season that's sort of the second half of November to December
the site's getting you know up to three thousand visitors a day it really kind
of explodes at that point in time when we look at the revenue from November to
December and we compare it most of the time and I've talked to you know several
of my peers and friends who run sites as well most of the time we see that the
revenue in December is about two to three times greater than November so if
you have a site you could kind of gauge how much your site's gonna make in
December by the earnings in November now it always varies there's there's so many
different factors that play into it but it can give you a pretty good idea and I
encourage you to you know look at your historical earnings each year and then
that'll give you a better idea for your specific site what happens from November
to December and then even January so if you're interested in learning how to
build one of these sites yourself here are the four main steps these are high
level and if you want to learn more definitely check out some of the stuff
on the channel and consider subscribing I put out new material all the time and
take a look at some of the playlists I'll put some in the description since
you know for each one of these steps and concepts I could talk for hours on each
one first part you have to pick a niche when you pick a niche you need to make
sure that people are actually searching for it and that it's actually profitable
if you get this part wrong if you pick the wrong niche you're kind of screwed
right there's no way you can recover if you pick the wrong niche say if people
aren't searching for it or there's no products to be sold or no monetization
method then you can't do anything about it even if you do everything else
perfect after that you're gonna have an issue the second part is creating the
site so you'll need to get a hosting package get
a theme most people build on WordPress but if you are a coder of some kind or a
designer and you like to use some other you know CMS out-there content
management system or if you just want to code in HTML you could do that
however WordPress is super easy and if you're trying to do Amazon affiliate
marketing it's best to focus on the marketing part not the design or coding
or whatever so I would just advise you just get a hosting package use WordPress
and move forward you need to spend your time on the marketing part once you have
your site set up and you have a theme and it looks nice and everything then
you publish content I recommend starting small now a lot of people will tell you
to go to the big model you don't want to have a small microsite but I say they're
making a big mistake and they recommend to publish like 50 or a hundred or 200
posts which is really hard even if you have like unlimited resources and all
the money that you need to have that publish it's still hard to say hire
writers pull together all the content get it published it's not just a slam
dunk and if you outsource all that stuff there's a lot of work just in the
administration and like sending e-mails back and forth like I said even if
you've got unlimited resources it's not easy to publish 200 articles for example
so I recommend to start and launch with 10 posts that's it just tag 50% of it so
5 articles should be affiliate reviews where you talk about a product and
recommended those are the ones that you can think of as like money articles and
the other 5 the other 50% should be how to or informational content you want to
have the blend you know Amazon wants you to have like a
regular sort of blog where you're not just publishing affiliate advertising
content but you're also providing value to the community at large
you know the niche community that is you're providing a site that people
actually want to read so if you just have like really aggressive sales
content Amazon is not gonna like that in fact
you may not even get approved to the program if that's all you have so make
sure you do 50/50 but don't go crazy just publish ten pieces of content to
launch after you have your site launched you have your ten pieces published then
you need to promote your site you need to get traffic to your site the primary
goal is to get organic SEO traffic from Google to your site yes there are other
search engines but the majority of it is through Google so I would recommend just
focusing on you know Google traffic even though there are other search engines
out there that said the main thing that you could do to rank well on Google and
staff good on-page SEO which I have like a checklist that I'll refer to another
video below in the description but basically you want to have your keyword
in the title you want to use the keyword in the first paragraph or so like the
first 100 or 200 words you want to have some images on the page that have a file
name which is keyword rich you don't want to stuff the whole article with
keywords that's kind of an old-school SEO tactic like a decade old that
doesn't work anymore so don't do that you'll want to have like a naturally
written helpful article that solves the problem of the visitor the other portion
of SEO is to have backlinks and there are two main areas that I want you to
focus on if you're trying to get backlinks blog commenting and guest
posting so I like to keep things simple that seems to be the most effective way
where you can sort of stand out from your competition so if you find blogs
and your niche comment on them build relationships with those bloggers and
then in the future say after you've made contact with them maybe like three weeks
till like two months you can ask them if maybe you could guest post on their site
what you don't want to do and what a lot of people do is they just send an email
and they ask if they can guest post on someone's site that can work sometimes
but really it's kind of aggressive and pushy and you're not making any friends
if you comment on people's blogs and have some correspondence with them first
you're kind of making like internet friends with them and that's a good
thing too because you're building a relationship
and basically those are the four main steps so those are high-level and if you
do want to learn more definitely check out some of the playlists that I've
placed in the description again have a look around check out some of the other
videos if you like what you see please subscribe I put out new content all the
time actually on Fridays I usually do a Q&A so if you have questions be sure to
hop on the live Q&A and I just answer your question here's the question of the
day what would you do if you had a site that was making you seventy thousand
dollars a year how would it change your life would you be able to say take more
vacations pay off debt eat out more often maybe you could pay off your house
early let me know in the comments below just curious about you know what you're
into and what you would do with an extra 70 thousand per year thanks for watching
the video again I'm Doug Huntington for niche site project
-------------------------------------------
Minimalist Life | 5 Simple Recipes | ANN LE - Duration: 6:44. For more infomation >> Minimalist Life | 5 Simple Recipes | ANN LE - Duration: 6:44.
 -------------------------------------------
Simple Creamy Butternut Squash Soup (whole food vegan, oil-free) - Duration: 8:28.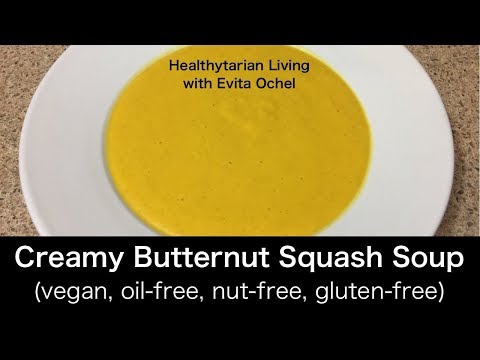
Welcome to Healthytarian Living. In today's video I will be sharing with you
how to make a simple creamy butternut squash soup. Butternut squash is part of
the winter squash family and these are wonderful additions to a whole food
plant-based diet, especially through the seasons of fall and winter. This is when
we have all of these wonderful winter squashes readily available and for many
of us, if we live in North America they will also be from local sources. Of
course always try to source organic as much as possible. Winter squashes, such as
butternut squash are a fantastic source of healthy, wholesome carbohydrates,
namely starches as well as some healthy sugars. They are also a wonderful source
of fiber. They are naturally low in fat, however the fact that they do contain is
of course full of beneficial fatty acids, including some omega-3 fatty acids. And
they are also a source of protein. Of course being this beautiful color, they
are rich in various healing and protective phytonutrients, in
antioxidants and offer us a wide array of vitamins and minerals. The tools
needed for this soup include having access to a stove. You will also need
some kind of a pot, in which to steam your butternut squash, as well as to warm
up your soup as needed. You can use a large 5 quart pot or you can do it on a
type of skillet or wide pan, or you can do it in another sized pot. It will all
depend on the size of your butternut squash and the amount of soup you want
to make. You will also need a ladle. You will need some basic utensils, including
a spatula and specifically you will need a large heavy duty knife. In addition, a
measuring cup as well as a cutting board. And one of the most important parts will
be to have access to a high-powered blender. In terms of the ingredients for
this soup, first of course you will need a butternut squash. The size will depend
on how much soup you want to make. I recommend somewhere between a small and
a medium one for two to four to even six servings of soup. An onion is optional
here, a fresh cooking onion of your choice.
It does add extra nutritional and health benefits to the soup, as well as a nice
added flavor. To make your soup creamy you need either raw soaked cashews or
coconut butter. Coconut butter is whole coconut in it's pureed form. Be sure not
to use any extracts or oils for the soup. Next, we will also need some water. And in
terms of the herbs or spices that you will be using for the soup you have a
few options, and as always I encourage you to modify and adapt it to meet your
needs. What ingredients you have on hand and what you would most enjoy. Some great
options for the soup include turmeric. This can be in its dried or fresh form.
Cinnamon, typically in its dried form. you can also use fresh or dried ginger.
Cayenne pepper, black pepper or any other spicy spices. And finally some
unrefined sea salt or Himalayan salt. First, take your pot and fill it with
about two or so inches of water. You want enough to cover the base, but a little
bit more than enough. Next, place your pot on the stove, cover with a lid and begin
heating on high. Take your butternut squash and wash it thoroughly. We are now
ready to start cutting the butternut squash. Do note that winter squashes are
very hard in texture and this actually makes them quite difficult to cut. As
mentioned in the tool section, make sure you have a heavy-duty knife and be extra
careful and cautious with how you are holding your squash and how you are
going to cut it. Always try to cut your butternut squash with the flat ends down.
This will make it safer and easier for you. I recommend cutting the thick base
off first, and then proceeding to cut off any parts of the top, and then sectioning
it down into quarters. Once you have the open seed part, scoop out the seeds into
your compost bowl. Once you finish cutting the butternut squashes, you are
ready to place it into your water. By this time your water should be boiling.
Carefully open the lid, lower the heat down to simmer and start placing your
butternut squash. I recommend skin down. Once you have your
butternut squash in the pot, cover it back up with the lid and you can
continue cooking on low, which is simmer. This will
take about 20 to 25 minutes or you can turn up the heat roughly to medium and
this will take about 15 minutes to steam the butternut squash. Be sure to set your
timer as this will ensure that you don't overcook or undercook your butternut
squash. Now proceed to peel and cut up your onion. To peel the onion, it's
generally a good idea to trim off the ends, then remove the skin and then
simply you need to quarter the onion. Place it on top of the butternut squash
for steaming. Once your timer goes off, carefully open the lid and test your
butternut squash with a fork. The fork should easily go in. Assuming that it is
done, turn off the stove and remove the butternut squash from the hot surface. At
this point you have a few options. You can remove the skin off the butternut
squash, cutting them into smaller pieces and then slicing with a knife along the
edges thinly to just remove the skin surface, or you can simply use them as
they are with the skin intact. This is especially great if you are using an
organic butternut squash. Place all of the butternut squash and the onion, as
well as all of the water from the pot into your blender. Add at this point your
coconut butter or your cashews. For a small to medium butternut squash and
depending on how creamy you'd like your soup, use anywhere from as little as one
quarter cup to half a cup, to even one cup of the coconut butter or your soaked
cashews. When it comes to your salt, you can sprinkle in a small amount or
measure out on a teaspoon about quarter to half a teaspoon of your salt. For this
version of the soup I'm going to be using some cinnamon. For your cinnamon
you can be more liberal, especially if you enjoy the flavor of cinnamon. This
adds some more wonderful antioxidants and phytonutrients, and adds such a
wonderful flavor to the soup. For this version, I'm also going to be using some
dried turmeric powder. With turmeric you have to be a little bit more
conservative, and so usually about quarter to half a teaspoon is all you
need. Now these are going to be the only additions I'm going to be adding to
today's version of the soup to have a nice mild, almost like a
sweeter flavor. However, should you choose to have a spicy tone to it, then by all
means you can use some spicy peppers as well. Finally we need to add our water.
Now depending on the size of your butternut squash and how much water you
had in your pot, you can use as much as 1 to 2 cups of water.
This will also depend on how thick or runny you would like your soup. And so
today I'm going to be adding enough water to pretty much cover all of my
ingredients and that is usually a good consistency. At this time you are ready
to cover your blender and blend all your ingredients on high until a smooth
creamy consistency results. And here is our finished product — a beautiful, bright
yellow-orange butternut squash soup. So creamy, so comforting and so delicious!
From here you have a few choices. You can serve this soup as is, as it will still
be warm enough or even hot enough to be consumed fresh. You can also store any
leftovers by closing the lid back on the pot, allowing it to cool accordingly and
then storing it in the fridge. This soup should last two to three days in the
refrigerator comfortably. Of course in a sealed container and making sure that
you always remove any soup you are eating with clean utensils. I hope you
enjoy making your version and experimenting as well with slightly
different spice combinations, as well as perhaps other winter squashes
that would also be suitable to make this soup.
-------------------------------------------
Simple Life hacks || How to Make Fruit Car By Fruit - Duration: 6:01.
How to Make Fruit Car By Fruit
-------------------------------------------
Zendaya Reveals Ingenious And Simple Way To Cope With Stress - Duration: 3:35.
Zendaya Reveals Ingenious And Simple Way To Cope With Stress
Life can get really stressful at times.
No matter the job or responsibility, stress levels affect everyone at some point.
For singer and actress Zendaya, she attempts to take it all in stride and when the pressure becomes a bit too much, she has a favorite way to cope.
Zendaya has successfully and impressively made the transition from Disney channel star, her last episode of K.C.
Undercover aired just last week, to budding Hollywood actress.
She's gone on to make a real statement and name for herself in both the style and acting worlds.
She was also a finalist on the popular reality dancing competition show Dancing With The Stars.
Last year, she landed a role in the film The Greatest Showman, starring alongside Hugh Jackson and Zac Efron.
Zendaya has been open about what a whirlwind that movie and premiere were as it was her first big departure into serious Hollywood films.
When the stress becomes too much for the beauty, she retreats to a specific corner in her house for a mental break.
She shared how she manages the ups and downs of stress on Twitter.
It looks like the methodic repetition of coloring and the type of concentration that it requires can be very soothing.
It can also take the individual back to the days when they would color as a young child, this experience can be comforting and grounding.
There have been a few studies that show the benefits of coloring as a way to manage stress and strengthen mental health.
It looks like it works for Zendaya.
She takes a half hour or hour to herself whenever she needs and breaks out the coloring supplies.
The practice of coloring can help empty the mind and slow it at the same time.
A lot of stress is the result of a culmination of thoughts that aren't well managed.
Coloring can help individuals disregard those thoughts or gain a necessary perspective on them.
A coloring station complete will all the items to make a great picture can be something that anyone can have access to.
The idea is inexpensive and can be done practically anywhere.
-------------------------------------------
how to get your google account back on youtube ( easy and simple 2018 ) - Duration: 1:19.
what's up guys today i am showing you how to get your google account back on youtube if you do this on porpoise or on accident this is what you wanna do so let's get started
Không có nhận xét nào:
Đăng nhận xét