Arabic Mehndi Designs
-------------------------------------------
An Unique Charm And Elegant House With A Simple Shape (830 Sq. Ft.) | Adorable Small House Design - Duration: 2:01.
An Unique Charm And Elegant House With A Simple Shape (830 Sq. Ft.) | Adorable Small House Design
-------------------------------------------
Simple Multicolored Die Cuts - Waffle Flower Crafts! - Duration: 10:54.
hi it's Therese and I've got a video that I'm sharing at the Waffle flower
crafts Channel. Today we're going to be making a card and I'm going to be
sharing a really simple way to create a multicolored die cut so this is a really
intricate die from Waffle flower crafts it's called make a fish and it's heaps
of fun but there's so many tiny little pieces now what I've done here and this
is one of the easiest things you can do is I've actually die cut the whole
design out of white card stock so this is a really nice smooth white card stock
because I'm going to be using my Copic markers today to add color I'll show
what I mean in the minute at the moment I'm just making sure that I get every
little piece of the die cut and keep every little tiny little piece from
within the die cut just in case I want to keep them and inlay them because
that's the wonderful thing about this die cut is you can make it as intricate
and as fun as you want or you can pretty much keep it really really simple and
you can actually die cut it with lots of different colored cardsstocks and mix it
up and match it up and that would be heaps of fun as well
but today the technique that I'm sharing with you just shows them a kind of
little cheats way of getting that multicolored look without having to do
lots of die cutting so what I'm simply doing is adding my color by using my
Copic markers and the big benefit of this is that I can actually add some
shading as well I don't have to just have, you know, if you use colored
cardstock or design paper you are you're pretty much obligated to use those
colors although you can mix them up and change them up with Copic markers as
well like you can actually color your cardstock your colored cardstock all
your design paper with your Copic markers or even with pencils
this is just an easier option for me anyway now my blending wasn't
particularly good in the body of my fish but I wasn't actually too worried about
that because I know that a lot of it's actually going to be covered up and it's
not really going to be noticeable but you could be as pedantic as you want
here the one of the great thing too is that I can actually if I was die-cutting
these flowers out of some color cardstock then I would be I would have
to cut them in different lots of colors to get that multicolored look the good
thing about this die-cut is it does have all those pieces within it so if you
don't have Copic markers or if you didn't want to color it with your
pencils or paints or whatever other medium you've got you have got that
option with this particular die set is that you can actually cut it out on all
the different layers and still get that look because you'll notice me I have to
go kind of searching sometimes for my little bits and pieces but most of them
I've got within it so I just actually put them all into a little Bowl so that
I could find them and I didn't have to go searching too far for them I'm using
a few different colors of Copic markers as ... I'm searching for a flower here
found it but I am actually adding that bit of shading even on these little
flowers I think it just it's just these small details that add so much to a card
design and I think I don't know about you that BG 11 would have to be my most
favorite color it used to be BG 10 and Copic markers
until I got BG 11 and seriously there's not that much difference between the two
but for some reason I find that the BG 11
just blends that bit easier if you have one or the other you've pretty much got
the same color but I like BG 11 it's so pretty now I was sort of playing up
playing around with the colors here and I originally was planning on or thinking
about having a pink head for my fish but I did come in and change my mind because
I had also die-cut a base of my fish originally I did it in white but I
didn't want to actually inlay all the pieces I didn't want this to be dare I
say too busy because it is really busy and it is intricate but I wasn't
originally I was thinking about doing a dark gray background on my fish so I did
actually cut one of those but then I was actually toying with the idea of adding
some Copic coloring to the white fish that you can see up there and that way
you'd be able to do it'll be fun to do as well you know all those little tiny
holes that I didn't that I don't fill in with my little tiny inlay with the
little die cut pieces I could have actually colored those in in different
colors I seriously had a blast putting this fish together it's actually the
first time that I have used this die and I that's really sad but I've been so
busy, I know, go figure I've been really busy lately what with you know all the
holiday season and working and I'm making cards and videos that I just
hadn't had a chance so this die was on my to-do list and I'm so glad I finally
got the chance to use it now I am using the matte medium here to adhere my
pieces you could use any of liquid glues or you could even use a dry adhesive or
use adhesive behind your die cuts before you cut them but I just find that
the liquid glue just gives you that little bit of time so that you can actually
move your image around before you commit and the good thing with the matte finish
on the glues is that if you do move it a little bit too far or the glue does
squish out the sides you won't see it when it dries it dries a matte not the
shiny glue I did decide to use my dry adhesive behind the body portions of
their fish I don't know why just felt like the right thing to do and I didn't
want to wait for the glue to dry for this I know it does dry really quickly
but this seemed to work well for me and the dotted adhesive works well if you've
got um like sort of die cuts because that doesn't drag over the holes within
the die cut you can actually wipe them away because they're just dots of
adhesive how cool are these colors how cool is this fish it's so sweet I didn't
show you this piece of I just sort of decided to color up the eye to match the
colors that I've used within the body of the fish but you can obviously look at
the little pieces within the die-cuts and use as many or as few as you want
it's just um he's fun I think I already said that didn't I and for the
tail of the fish originally I was actually going to put like a die-cut
gray piece on the base of that but then I just thought it needed that a little
bit more Orange yes needs more orange and more pink and I was able to because I
used the Copics I was able to actually do that with sort of an ombre and a bit
of a shaded effect so for my card itself I once wanted like a little watery kind
of background so I've got the distress oxide ink and I'm adding that to some
Bristol cardstock and adding heaps of ink with my blending tool and then I've
just come in with my water spray bottle and then I can use paper towel and just
pick up those droplets of water and it just removes some of that ink and
gives it that real fun look so the stamp set that I'm using today is coordinating
it's also called make a fish and it has lots of fun bold sentiments and this is
actually the second time I created my front panel for my card because I got
ink on the other one anyway so you get to see this set up second and
better version as I've stamped out my sentiment using the new fishing pond ink
and I'm using the stitched layers dies to cut a window within the frame and
then I can just adhere this panel to the you know that watery panel that I
created and normally I'd pop this up but today I just didn't feel like it and I
have a landscape top fold card that I'm going to adhere this to and just using
my adhesive again I'm using lots of adhesive I probably don't need to use
that much I got a bit carried away I love the ATG and have heaps of fun
with that now it's my friend and we've bonded it's great and then all I did was
actually pop my little fish and that's my finished card for today
so thanks for joining me I've had heaps of fun don't forget to head through the
links in the description below and you'll find all these great products and
the links to my blog I look forward to seeing you then until next time
happy papercrafting bye
-------------------------------------------
Present perfect simple and time adverbs - Duration: 10:01. For more infomation >> Present perfect simple and time adverbs - Duration: 10:01.
 -------------------------------------------
Simple, 'Cartoonish' Sketch Helps Pa. Police Identify Theft Suspect - Duration: 0:28. For more infomation >> Simple, 'Cartoonish' Sketch Helps Pa. Police Identify Theft Suspect - Duration: 0:28.
 -------------------------------------------
Comment programmer votre télécommande HORMANN HSM4 sur un récepteur SIMPLE UNICO? - Duration: 2:34. For more infomation >> Comment programmer votre télécommande HORMANN HSM4 sur un récepteur SIMPLE UNICO? - Duration: 2:34.
 -------------------------------------------
simple maggam work blouse designs | hand embroidery stitches flowers | back neck blouse designs - Duration: 2:20.
simple maggam work blouse designs
-------------------------------------------
Thrive Life: Simple.Clean.Food. Comida. Limpia. Sencilla. - Duration: 2:09.
Food is amazing! Think about it: traditions, memories, so much happiness!
But food can also bring a lot of stress. Thrive Life wants to take away the
stress, by delivering simple clean food right to your door! How would that help
you ask? Well, we've done some research! Approximately one in 42 trillion people
actually like to wash, peel and chop fruits and veggies. And approximately one
in 56 bajillion people enjoy throwing out rotten produce! (Ewww!) Our research found
that a lot of the stress comes from planning meals.
Although 43% of the population claims to pre-plan their meals, we found that less
than 1% actually do. So we had an idea: Let's help people not stress out about
food! Enter Thrive Life! Ingredients that are pre-washed, pre-cut and freeze-dried
to lock in all those nutrients and delicious flavors, and it won't spoil in
days or even weeks after buying them. Ingredients that aren't loaded with
additives, preservatives or GMOs, and for those nights that you just don't have
anything planned or frankly don't like the plans you did have, there's Simple Plate!
It's a meal kit that's better than any meal kit you've experienced,
according to our research. It's planned, prepped and pre-portioned deliciousness
and it doesn't have to be made tonight. Iit's ready when you are!
How do we do all that? It's basically magic! We start with the best produce
picked at the peak of perfection. Then we freeze-dry it in the most
state-of-the-art facility in the galaxy! We lock in the taste and nutrients so
our produce is as fresh as the farmer's market, which makes it perfect for
snacking by the way. Want to try it out? Simply set up a delivery service account
and start shopping. Schedule at least three deliveries in
the next 90 days, and you'll become a preferred customer for free! You get all
kinds of perks, like free shipping! So why would you want simple, clean food delivered to
your door? I think the research says it all! Enjoy simple clean food that's
ready when you are, and make sure the only thing getting spoiled here is you!
Try Thrive Life tonight!
-------------------------------------------
Simple Creamy Butternut Squash Soup (whole food vegan, oil-free) - Duration: 8:28.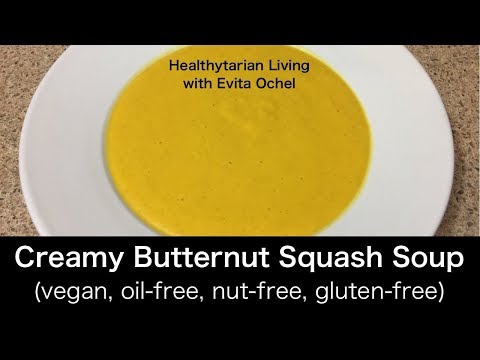
Welcome to Healthytarian Living. In today's video I will be sharing with you
how to make a simple creamy butternut squash soup. Butternut squash is part of
the winter squash family and these are wonderful additions to a whole food
plant-based diet, especially through the seasons of fall and winter. This is when
we have all of these wonderful winter squashes readily available and for many
of us, if we live in North America they will also be from local sources. Of
course always try to source organic as much as possible. Winter squashes, such as
butternut squash are a fantastic source of healthy, wholesome carbohydrates,
namely starches as well as some healthy sugars. They are also a wonderful source
of fiber. They are naturally low in fat, however the fact that they do contain is
of course full of beneficial fatty acids, including some omega-3 fatty acids. And
they are also a source of protein. Of course being this beautiful color, they
are rich in various healing and protective phytonutrients, in
antioxidants and offer us a wide array of vitamins and minerals. The tools
needed for this soup include having access to a stove. You will also need
some kind of a pot, in which to steam your butternut squash, as well as to warm
up your soup as needed. You can use a large 5 quart pot or you can do it on a
type of skillet or wide pan, or you can do it in another sized pot. It will all
depend on the size of your butternut squash and the amount of soup you want
to make. You will also need a ladle. You will need some basic utensils, including
a spatula and specifically you will need a large heavy duty knife. In addition, a
measuring cup as well as a cutting board. And one of the most important parts will
be to have access to a high-powered blender. In terms of the ingredients for
this soup, first of course you will need a butternut squash. The size will depend
on how much soup you want to make. I recommend somewhere between a small and
a medium one for two to four to even six servings of soup. An onion is optional
here, a fresh cooking onion of your choice.
It does add extra nutritional and health benefits to the soup, as well as a nice
added flavor. To make your soup creamy you need either raw soaked cashews or
coconut butter. Coconut butter is whole coconut in it's pureed form. Be sure not
to use any extracts or oils for the soup. Next, we will also need some water. And in
terms of the herbs or spices that you will be using for the soup you have a
few options, and as always I encourage you to modify and adapt it to meet your
needs. What ingredients you have on hand and what you would most enjoy. Some great
options for the soup include turmeric. This can be in its dried or fresh form.
Cinnamon, typically in its dried form. you can also use fresh or dried ginger.
Cayenne pepper, black pepper or any other spicy spices. And finally some
unrefined sea salt or Himalayan salt. First, take your pot and fill it with
about two or so inches of water. You want enough to cover the base, but a little
bit more than enough. Next, place your pot on the stove, cover with a lid and begin
heating on high. Take your butternut squash and wash it thoroughly. We are now
ready to start cutting the butternut squash. Do note that winter squashes are
very hard in texture and this actually makes them quite difficult to cut. As
mentioned in the tool section, make sure you have a heavy-duty knife and be extra
careful and cautious with how you are holding your squash and how you are
going to cut it. Always try to cut your butternut squash with the flat ends down.
This will make it safer and easier for you. I recommend cutting the thick base
off first, and then proceeding to cut off any parts of the top, and then sectioning
it down into quarters. Once you have the open seed part, scoop out the seeds into
your compost bowl. Once you finish cutting the butternut squashes, you are
ready to place it into your water. By this time your water should be boiling.
Carefully open the lid, lower the heat down to simmer and start placing your
butternut squash. I recommend skin down. Once you have your
butternut squash in the pot, cover it back up with the lid and you can
continue cooking on low, which is simmer. This will
take about 20 to 25 minutes or you can turn up the heat roughly to medium and
this will take about 15 minutes to steam the butternut squash. Be sure to set your
timer as this will ensure that you don't overcook or undercook your butternut
squash. Now proceed to peel and cut up your onion. To peel the onion, it's
generally a good idea to trim off the ends, then remove the skin and then
simply you need to quarter the onion. Place it on top of the butternut squash
for steaming. Once your timer goes off, carefully open the lid and test your
butternut squash with a fork. The fork should easily go in. Assuming that it is
done, turn off the stove and remove the butternut squash from the hot surface. At
this point you have a few options. You can remove the skin off the butternut
squash, cutting them into smaller pieces and then slicing with a knife along the
edges thinly to just remove the skin surface, or you can simply use them as
they are with the skin intact. This is especially great if you are using an
organic butternut squash. Place all of the butternut squash and the onion, as
well as all of the water from the pot into your blender. Add at this point your
coconut butter or your cashews. For a small to medium butternut squash and
depending on how creamy you'd like your soup, use anywhere from as little as one
quarter cup to half a cup, to even one cup of the coconut butter or your soaked
cashews. When it comes to your salt, you can sprinkle in a small amount or
measure out on a teaspoon about quarter to half a teaspoon of your salt. For this
version of the soup I'm going to be using some cinnamon. For your cinnamon
you can be more liberal, especially if you enjoy the flavor of cinnamon. This
adds some more wonderful antioxidants and phytonutrients, and adds such a
wonderful flavor to the soup. For this version, I'm also going to be using some
dried turmeric powder. With turmeric you have to be a little bit more
conservative, and so usually about quarter to half a teaspoon is all you
need. Now these are going to be the only additions I'm going to be adding to
today's version of the soup to have a nice mild, almost like a
sweeter flavor. However, should you choose to have a spicy tone to it, then by all
means you can use some spicy peppers as well. Finally we need to add our water.
Now depending on the size of your butternut squash and how much water you
had in your pot, you can use as much as 1 to 2 cups of water.
This will also depend on how thick or runny you would like your soup. And so
today I'm going to be adding enough water to pretty much cover all of my
ingredients and that is usually a good consistency. At this time you are ready
to cover your blender and blend all your ingredients on high until a smooth
creamy consistency results. And here is our finished product — a beautiful, bright
yellow-orange butternut squash soup. So creamy, so comforting and so delicious!
From here you have a few choices. You can serve this soup as is, as it will still
be warm enough or even hot enough to be consumed fresh. You can also store any
leftovers by closing the lid back on the pot, allowing it to cool accordingly and
then storing it in the fridge. This soup should last two to three days in the
refrigerator comfortably. Of course in a sealed container and making sure that
you always remove any soup you are eating with clean utensils. I hope you
enjoy making your version and experimenting as well with slightly
different spice combinations, as well as perhaps other winter squashes
that would also be suitable to make this soup.
-------------------------------------------
The present simple in English (How can I use it?) - Duration: 4:16. For more infomation >> The present simple in English (How can I use it?) - Duration: 4:16.
 -------------------------------------------
Simple step by step guide to booking online - Duration: 1:32. For more infomation >> Simple step by step guide to booking online - Duration: 1:32.
 -------------------------------------------
How to Make a DIY Ring. Simple Handmade Ring from Beads. - Duration: 11:08.
Hi my darlings!
I am very glad to see you on my channel again.
This video is about
how to create a simple and dainty ring.
If you remember, I already made earrings
and bracelet from the same materials.
If you have not seen them yet,
I leave links to them in the description.
Also don`t miss next tutorial
where I will show how to make a haircomb.
Don`t forget to put your thumbs up,
I will appreciate for your subscription and comments!
And now let`s get started!
Fold in half a 0.5 mm wire 60 cm long
Slide a 3 mm crystal bead onto the wire
Twist the bead 10 times
Twist 2 more branches
Twist 3 small branches
Use 6 mm beads
Continue to add beads and twist the wires
Work with two wires
Twist the wires several times
Apply super glue
Take a 0.4 mm wire 80 cm long
Add a 4 mm bead
Place it in the center
Attach the wires at the bottom of the flower
Add an acrylic flower into the both wires
Take the ring base
If necessary, remove excess loops
Fasten the flower on the ring base
Fasten a 70 cm-long wire
Twist branches around the flower as shown in the video
Fasten a 60 cm-long wire
Add 10 bugle beads and 9 crystal beads
Wrap the wire around the flower
Done!
I think the ring is very pretty and comfortable!
You can wear it on different fingers
because the ring will fit to any size!
I wish you creative inspiration and beautiful works!
Subscribe to my channel,
see you soon!
Bye! :)
Không có nhận xét nào:
Đăng nhận xét