SUBSCRIBE please
Subscribe please
App link on description
Game link on description
Password:TECHNICALGUTI@@@MXP
TECHNICALGUTI@@@MXP
-------------------------------------------
Porsche Boxster 2018 | 2018 Porsche 718 Boxster Manual Review And Specs - Interior Exterior - Duration: 3:47.
Porsche Boxster 2018
2018 Porsche Boxster
2018 Porsche Boxster cabriolet
2018 Porsche Boxster Features
2018 Porsche Boxster Interior
2018 Porsche Boxster Seat
2018 Porsche Boxster engine
2018 Porsche Boxster exterior
-------------------------------------------
Jeep Wrangler Barricade Rivet Style Fender Kit (1997-2006 TJ) Review & Install - Duration: 4:54.
The Barricade Rivet Style Fender Flare Kit is for those of you that have a 1997-2006
TJ that are looking to swap out the flares for ones that are going to give you some additional
coverage, as well as a different look.
You can get wider flares that are factory style flares, but as it says in the name,
this is going to be a rivet style flare.
So you're gonna have these pockets in the flare and the rivet hardware is going to be
visible, giving you a little bit of that more off-road, more tough look, if that's what
you're after.
This set of flares is going to install very easily onto your TJ.
Definitely a one-out-of-three-wrench installation.
The only thing that can make this a little bit more difficult is some rust on your Jeep.
So if you do have some rust, give yourself a little bit of extra time.
But overall, this shouldn't be something that takes you much more than two hours to complete,
and we'll talk a little bit more about that installation in just a second.
So like I said, if you have a TJ, chances are your factory flares are going to be faded.
Maybe some of them are cracked, otherwise, just looking a little bit older.
You can spray them.
You can dye them.
You can hit them with a heat gun to try and bring the black back.
But if you want something that is truly new, fresh, right out of the box, and you're also
looking for additional tire coverage and something that gives you a different look, then that's
where these are going to come in.
This is going to be a very nice option for you, and it's going to be priced right in
the same realm as a lot of other ones out there.
There are going to be some different options out there for a wider rivet style flare kit.
I happen to like this one from Barricade.
I think it's well built.
I think it fits well.
It looks good.
And the price is right.
For construction, this is a tough ABS plastic.
It's designed to flex a little bit before it breaks, so if you are off-road and you
rub this up against a tree, it is going to give you a little bit of movement before you
were to break one of these flares.
As I've said a couple of times now, they have these cutouts, the pockets so that you can
see these rivets.
And all of the hardware that is needed to install these is going to be included, as
well as some rubber weather stripping that goes on this edge that goes right up against
the Jeep.
And that's going to help keep these from chafing the Jeep as you're driving down the road.
So your paint is going to be nice and safe, even after installing these.
Now, as you can see, this is going to be a six piece kit.
I have one front, one rear, and one mini flare here, but you do get all six pieces.
So, very complete, going to replace everything that you currently have with something nice
and fresh.
And I've mentioned a couple times that these are wider than factory.
These are going to give you 6 inches of coverage.
So whether you have a wider tire, less backspacing on your wheel, maybe both, and you're looking
for some additional coverage, these are going to provide that as well.
As for the installation, again, one out of three wrenches, maybe a little bit over two
hours to get these installed, but that will depend on how much rust you have on your Jeep.
Those factory flares are held in place with a lot of nutserts that are attached into the
body.
And if you have rust between that and the factory hardware, the nutsert can spin, making
it difficult to get everything apart.
Now, in the areas where you can gain access to the backside and actually hold that nutsert
with a pair of pliers, usually you can break everything loose.
But there are a couple of spots where you don't have access to the back of the nutsert.
And in that case, you're going to be drilling things out.
You're going to be grinding things off.
You're going to be reinstalling nutserts or using nut and bolt hardware if you can get
to the backside and the nutsert is no good.
So you might have to get a little bit creative if you do have some rust.
Spraying everything with a good penetrating oil well before you get started will give
you the best chance of a nice, smooth installation.
Now, the process is going to be fairly straightforward and fairly simple.
You're just going to be removing all of the hardware that attaches those flares onto the
Jeep.
Up front, make sure you pull the turn signal socket out of the turn signal housing before
you remove the whole flare from the vehicle.
Then you can unbolt your turn signal and bolt it into your new flare.
That is a nice feature of these flares, that you can reuse that factory turn signal housing.
You're not buying an additional light or trying to wire an aftermarket light in place.
This is going to work with your factory stuff.
Outback, the process is very much the same of unbolting everything.
You are going to have to pull that inner fender liner away a little bit if you do need to
gain access to the backside of some of those nutserts.
But all in all, you're just removing the hardware, removing the flare, bolting the new ones up
with the new hardware.
Very straightforward, but if you have some rust, take your time.
You are going to need your patience.
This set of six flares comes in at right around $300, and I do think that's going to be a
pretty good deal for you.
There are some other options out there that fall in and around this price range, so I
do think these are very fairly priced.
I like this design.
I like the way they look, and I like the way they fit.
So, if you're shopping for new flares, I think these ones are appropriately priced and a
nice choice.
So if you're looking to swap out those factory fender flares on your TJ with an aftermarket
set that is brand new, factory fresh, wider than factory, and also offers a different
style, I definitely recommend taking a look at this option here from Barricade.
And you can find them right here at extremeterrain.com.
-------------------------------------------
Parker SRX Shavette Razor Shave and Review - Duration: 15:21.
Greetings Gents! I'm Geofatboy for ShaveNation.com Since I have a nice
heavy beard growth today let's do a shave and a review of this Parker
shavette this is called the SRX it's a nice chrome finish and it is the hinge
type blade loading mechanism and this is the newest model as opposed to the
previous model which was the SRB also comes in white, this is black. This SRX is
heftier. It weighs in at 2.1 ounces or 60 grams.
Whereas the previous model was a bit lighter at 1.3 ounces or 37
grams. So we're going to use this baby today it's a nice chrome finish to it. T
The only drawback might be that it does leave fingerprints when you
touch it which is no big deal. By the way if you buy it from Shave Nation it comes
with 6 half blades free included. Shark, Derby, Perma-Sharp, Sharp, 7AM, and Lord.
You get one of each if you buy it from Shave Nation so that's a pretty cool
incentive to get it. Keep in mind that you can also use a regular double edge
razor blade like this right here this is an Astra blade but all you need to do is
take the blade insert it into the paper packaging like I have just done fold
over the paper and just be careful when you snap this. Don't put your fingers on
the sharp edge. Snap it, and then you can remove the half and insert it the same
way just like this. Here's the half blade that I snapped. OK we'll put those down
because I'm going to use the Perma-Sharp. I haven't shaved with a Perma-Sharp in a
long time so let's see how this works out. As far as loading - it you just
separate the two arms like this and you can see the two pins right here just
take the blade it's got little grooves. Insert those grooves right
next to the pins just like that, and then take the arm
and fold it over, and it will snap onto the pins like so, and then just bring the
hinge down. Just be careful you don't touch it with your finger or your thumb
underneath. Bring the hinge down all the way and it locks the blade in place.
It will not move. The soap I'm going to use is this Colonel Conk Bay Rum which is a
glycerin based soap so the cool thing about that is that you can melt it down
in a microwave or on the stove and just pour it into your favorite container
which I've done here this is a little palm-sized, this is a little palm - spilled
the water right on the razor! This is a little palm sized shaving bowl right
here. The brush I'll be using is this Fine Stout brush which is a synthetic
brush it is a 24 millimeter knot. Here's a look at the bottom of it and I will just
soak this in the water. With these synthetic brushes you want to shake the
bulk of the water out not like a badger brush, you can leave it really wet. These
you need to really give it a good shake to remove the water otherwise you'll get
way too sudsy with your soap. Here's what it looks like. It's kind of
funky looking but that's fine. And I'll just dip that right in the Conk Bay Rum
and start swirling there... And you can see quickly it starts building some lather,
and it's already loading on the brush. So what I will do is warm my face up, and
we'll get on with the shave!
I've got my face nice and wet let's just take the brush and go right to the face...
What happens now? Let's Clear The Runways! So we can see our sideburns, and dry the
finger, most important before you pick up that sharp object. The blade is loaded.
You can go with one finger in front and three in the back, or two in the front
and two in the back of the pivot like so. For cutting the sideburn I'll just go
with one, and we'll work on just finding the angle, slightly outward like that, and
just work our way down...
Just to cut the sideburn straight like so, and then you can stretch the skin
and just follow down with your fingers as you stretch the skin...
Excellent! Very comfortable, nice and easy, you can see the shaving cream and beard that's been removed.
I'll rinse that off. OK now I'll switch to my left hand for the left side.
And just cut that sideburn.
And then you can stretch.
And just follow down with your fingers.
Very nice! It took it right off, just one pass look at that! OK now we'll go
around the chin area.
Left side of the Chin.
Cleft
Now we'll work our way down the chin area.
Very smooth - very nice and smooth. Left side
Now the mustache area
The Shavette is nice, you can get directly under the nose to scoop out those hairs.
And puff the cheek if you need to. Nice! OK now the left side.
After the first pass look how beautiful, nice and smooth. It removed my heavy
beard growth no problem whatsoever. I could stop right here but let's get a
little extra close and we'll do one more pass. Just so you can see how the
second pass is done. I'll just lather up a little more of this soap...
Let's Clear Those Runways! Now we'll open up the razor like this and use it
like a Japanese-style razor. And we'll start at the bottom and work our way up.
This will get you extra smooth!
Now the other side I'll use my left hand here.
And here we'll go across the grain you
can stretch if you need to.
OK and the other way across the grain...
Nice!
It's a little tricky getting inside that clef to clean it out. OK a little bit
more lather here. I'll go across here
and back this way.
OK, now a final rinse off. I'll take the Shave Nation Alum Block the Wide-Stick
and just wet that under the water, cold water, and glide that all around. Let
that soak in for about 30 seconds to a minute and then we'll rinse that off.
And pat the face dry. This is Ogallala Bay Rum. This is probably one of the
most popular Bay Rums. It's been around for a long time. Very nice smell to it, it's an
excellent fragrance, scent. You can spray it into your, this is a sprayer it comes
in a regular pour bottle as well. But here's a sprayer so you can spray it
into your hand like so, and then right to the face, or a couple of squirts on the
face and Oh Yeah! Nice strong bay rum scent and sting! Nice slap and sting Oh,
and burn! It's burning right now. Feels great! Mmm nice burn! OK very good
burning, still burning... It's gonna burn for a little while, I could tell. Very
refreshing. This will be a nice wake-up call in the morning! OK back to the
razor. The parker SRX it is made by Parker Safety Razor which it says right
here. And here it says since 1973. It is stainless steel says right here, so you
never need to worry about it rusting and then on the reverse side it says Made in
India, and again stainless steel. There's a nice look at it. Excellent razor, you
can see that it took my heavy beard growth only 2 passes, removed it quickly
and easily. And it was very comfortable to shave with. The shiny finish could be
slippery, so make sure you dry your fingers. If you want to pick one of these
razors up just click under the video where it says Show More and there will
be links to all the different products used in the video or go to
Shave Nation.com and enter in the search box SRX it'll pop right up!
And you'll get the six different brands of blades with it one of each
one, and you can test-drive those blades and see which one you like the best and
then maybe you can pick up a bulk pack of a hundred blades, the half blades, and
keep in mind you can also split your DE double edge safety razor blades and use
them in here as well. I hope you enjoyed the video, thank you very much for watching.
I'm Geofatboy, Have A Great Shave Have A Great Day!
-------------------------------------------
Airsoft Review / ICS CXP-MARS SBR with S3 system (english subs available pt. 2/2) - Duration: 4:57.
Hi folks how are you doing!?
Today we have the second part or the MARS SBR review.
We will take a look at the battery
Check which mags fit
And also we will have some field testing
So you can really see whats like to use one of these
We are going to use a LiPo battery
It goes inside the buffer tube
We need to use the square/stick type
Like this one...
This is a Valken
11.1 volts
It must fit inside the tube nice and easy
Connect it and its ready to go
Take this into account in case you are planning to get a battery for this AEG
It needs to fit inside a regular buffer tube
Now, lets talk about mag compatibility
It come with an ICS mag and so, ICS mags will fit well evidently...
But lets check other brands of mags
Here we have a Modify one...
a G&G one...
and AMOEBA. Lets start with this one
Fits well, stays well
Here's the Modify one...
Fits well
Stays well
And now, the G&G one...
Fits well, stays well.
So, if you want to run other brands of mags
You can do it.
This options are good for variety's sake
Ok, now we are going to record some gameplay...
Lets see how it shoots and how it handles in game.
Really easy to maneuver in tight spaces
HIT!!!
Hope you liked it
comment and share your thoughts
Find links on the video description
So folks,
Stay awesome, see you on the field!
-------------------------------------------
2018 Hoyt Hunting Bow: REDWRX Carbon RX-1 Ultra Review - Duration: 4:23.
Hi guys Dan Pickar here with Eastmans' Bowhunting Journal. Today we have the
Hoyt RX-1 Ultra.
It's a Redwrx line from this year. This is the Ultra so it's 35
inches axle to axle. I think the standard one's 32 inches so it's a little bit
longer. Six inch brace height. IBO is 330. They've changed a lot this
year a lot of minor things and some major things too.
Fhe first thing I'd like to note is that the width of the limb pocket on the top
is a half inch narrower than the limb pocket on the bottom. So we're a full
half inches wider with our limb pocket down here which is new with the hyper
cam system and the split cable system and you can see the split off the mods
down here. This decreases the need for the reliability of a flex guard up here.
So there's no flexible cable guard anymore. It's just simply two rollers
attached directly to the riser and that's all you need. So that's pretty
cool but I also like from Hoyt this year too is is the offset stabilizer port. You
can see it's offset of center shot so it's offset to the left of the bow and
the whole reasoning behind it is to counterweight your sight and your quiver
up top and you can put any sort of stabilization system or just a regular
stab out the front or the back counterbalance your quiver and your
sight so and that will give you a nice stable platform. Regarding the rest on
some of the cable driven rests this is actually designed to tie in right in
here and this split of the cable but for example the Trophy Ridge Drop Zone I had
some clearance issues with this part of the riser and the cable just making
contact with it. Technically I don't think that it matters but it bugs me. I
don't like my rest cable coming in contact with my riser. Ror that reason I
prefer a limb driven rest on a Hoyt and so that's why I went with the Hamskea
on this one and you can see there's plenty of clearance
past the riser down to your lower limb here. All right new this year is the
X Act grip and I like it a little better than the traditional Hoyt grip.
It's a little more thin a little more streamlined but it's really comfortable
and it kind of has a flat back to it right here and so that's also
improvement from Hoyt this year that I really do like. So this is a six inch
brace height. Very comfortable draw cycle. It's one of the easier ones of any
Hoyts that I've ever shot to hold. New this year they're up to 85% let off so
that plays a big role into it but it feels like I could just sit here all day
and hold this this bow back so very comfortable. Very easy draw for 70 pounds rather.
This is a 28 inch draw so it's an inch shorter than what I normally shoot
but that's right in there. So yeah nice on the shot. Dead in the
hand. Can't really ask for any more from a new bow these days. So we'll shoot
another one and then we'll run it through the chronograph and see what
kind of speeds we're getting out of it.
Okay got the chronograph all set up.
We have a Bloodsport Punisher 300 this arrow with a hundred grain tip weighs
431 grains. I just weighed them at the office. So once again 70 pound limbs 28
inch draw let's see what we get. First shot haven't shot a through the
chronograph yet so let's see what it does.
279 not too bad.
Let's do one more just for consistency sake.
284 for a little bit of variance 5 feet per second difference but right around
280 feet per second. So that's pretty good and it's kind of to be expected. 28
inch draw 70 pound limbs and a 330 IBO alright guys that's the Hoyt Carbon
RX-1 Ultra. I forgot to mention too the carbon riser super nice to the touch in
the cold weather that's why I do really enjoy the carbon fiber riser. Be sure to
check out our other bow reviews, like this video and subscribe to our Channel.
thanks guys
-------------------------------------------
The Watch Studio Review - Duration: 3:51.
fingers fingers videoman sink back with another watch review right here I have
the watch studio I've done a lot of different watch subscription companies
just different watch reviews in general I'm interested to see what this $19
month subscription company has in store for us so the watch studio like I
mentioned is $19 a month Santos 25 I always got always got a hook
you guys up with a discount code Santos 25 gonna get you 25% off so
you're looking at about fifteen dollars to try this subscription out I want you
guys know that $1 of your subscription price goes towards a donation I know
this month was for the you know the Florida school shooting so they also
donated back to a good cause which is always good so let's just get right into
what this watch looks like boom look at that what you guys think I like the gray
band I really like a great battle and have a watch right now at the moment
with the gray band so I took this watch already out for a test drive this is not
the first time I actually all have already worn it when I took it out for
the test drive I received I received a couple compliments definitely people
actually work with this shirt you know it matches really well with this shirt
the grain and the white so I got a lot of compliments on on the color of the
band and just the look of the watches so I've done I've done a lot of watch
subscription companies before a couple at the you know the 19 the $30
subscription price and usually you receive like some cheap you know like a
just a Chinese product with no branding towards it the main thing with the wash
studio is they have a branding towards it so if you see on this watch you have
the brand there's a little logo right here you also have the look of a
multifunctional watch this is not a multifunctional watch it's just like a
fashion watch something that looks good for a good price
you're not you know if you're looking for like a collectible Rolex you know
really watch kind of swords have a person this is not for you but if you if
you want to watch this kind of look good you know get a different style every
month this is definitely something you might want to try out you have the look
of a multi-functional watch these don't actually do anything but you you have
the you have the ability to you know obviously change the time of
the date also on the clip also on the clip you have the brand the watch studio
I really like that they have actual brand for nineteen thousand months so
you're it's like you're buying something you write an actual brain you're not
just buying some cheapo product nobody knows uh like I mentioned about the
brand if you look at right here can you see that you have the watch studio you
also have this is the model that m2 they have the m1 I don't know if they have
the m3 yet they're fairly new company I'll leave all the links down below the
discount just to go check them out check out their social media I really like
what they're doing I definitely definitely approve of the watch studio
out of the other $19 subscriptions that I've tried before this one has it seems
to be my favorite so far because I like I just like the look of elective designs
I liked it they're doing their own watch they're not just buy and watches in and
just selling them like I've seen in the past and then when they when they
arrived they didn't even work so watch Studios really doing something nice here
$19 a month try it out for $15 with Santos 25 I approve of this watch right
here let me know what you guys think hope you guys like this video let me
know everybody haven't gone
-------------------------------------------
Starbucks Pike Place Coffee Review - Duration: 3:27.
- Hey, welcome to Coffee Coffee Coffee,
your place for average Joe coffee reviews.
Today's coffee is from Seattle,
but thank the Lord it's not raining.
(catchy music)
- Alright today we are reviewing
Starbuck's Pie Place Roast,
which is supposed to be smooth and balanced.
It's a medium roast.
And on the bag it says basically that
you shouldn't really have to pick out any,
or you can't really pick out any
particular flavors.
- Mmmm hmmm.
- Everything's supposed to just be consistent
and harmonious.
But then also,
it says that there are flavors of cocoa
and toasted nuts.
- That's weird.
- Yeah.
- It's like why name flavors.
How about this is a no label flavor society.
(laughs)
- Yeah.
- Why point out those flavors if you're not
supposed to be able to taste them.
- Right.
- Separately.
But what did we taste?
I don't know.
- Right, so this is a 12 ounce bag,
and the price was, what?
- Expensive.
(laughs)
Nine something,
so it was like 12 something a pound.
Which is on the higher end for average coffee.
- Yeah, 9.50 a bag.
Apparently was not on sale.
- No, it was on sale.
That's the regular.
- Oh. - We bought it
for like 6.99.
- Uh yeah. - So it's not as...
- We never pay full price for coffee.
- Not as bad, but if you're gonna get it
normally it's gonna be nine dollars a bag.
- Mmm hmmm.
- Our thoughts on this - Mmm hmmm.
- Are... - Yeah.
- As follows.
- So to me,
it's bitter
and burnt tasting.
- Yep.
Not burnt chocolate either.
- No no, not the pleasant kind of burned
or kind of bitter.
- Right. - There's some bitterness
sometimes like in Pete's Coffee and stuff
that's kind of nice but... - Mmm hmmm.
- This is just kind of burnt and bitter
- Yeah. - And I don't really enjoy it
at all.
- And on the bag it says to use two tablespoons
full per six fluid ounces
- Mmm hmmm. - Of water.
We did that the first time we drank it
and it was not as good as even
this with one and a half
- Yeah. - Tablespoons per
six fluid ounce cup.
- Yeah.
- So we made it a little better
by reducing the amount of coffee
- Right. - we put into the cup,
but it's still - Yeah.
- Is not to our liking.
- Yeah, yeah.
- Especially at that price.
- Yeah, at that price.
- Well, even then,
even if it was less I wouldn't
- Yeah. - I don't think I would.
- Yeah, even if it was less
I'd be like no thanks.
It's not one I want to buy again.
Donut rating on this?
Two and a half?
- Yeah, maybe a two and a half.
- Yeah, I mean,
cause I feel like as you get further in the cup
it's like meh - Yeah.
- Some of the burnt taste kinda goes away.
- And you may be able to adjust the amount
to kind of help with it,
but so yeah, two and a half donuts.
Well, as we found,
and as other people commented,
Starbucks coffees typically have a
burnt kind of over-done flavor.
- Over roasted.
- Over roasted.
- I just made that up.
- Yeah.
But if you feel the same way,
or you feel differently,
reply to us in a positive manner
on how you feel differently.
- Yeah.
- And thanks for joining us.
And until next time.
- Keep drinking.
- [Man] Hey, thanks for watching our reviews.
Please be sure to subscribe and check out
our other reviews here.
-------------------------------------------
PACIFIC RIM: UPRISING - 30 Second Movie Review - Duration: 0:44.
Delivering a healthy dose of robot battles that will excite fans of robot battles but
losing much of the immersiveness and majesty that made its predecessor so captivating - Pacific
Rim Uprising is a disappointing sequel that can't quite rise up to the original due
to a weak script, shallow characters, and a robotic approach to action.
And although there's just enough Jaeger to muster a positive reaction from most, and
the adequate action leaves it far from horrific, fans of the motific specifics of the original
Pacific Rim flick will find this to be a soporific shtick, that doesn't quite click.
-------------------------------------------
Samsung S9 &S9 plus Honest review. - Duration: 5:32.
well samsung launched theS9 last month and we are all scratching our
head wondering if we should buy it since you are watching this video you guys
know what I'm gonna say S9 is the least upgradable phone ever made by
Sammy I'm not saying that because I hate Samsung in fact I use my note 8 to make
this entire video so please watch this entire video and I'm sure you will feel
the same so let's get started
so before we begin I want to make sure that you guys understand S9 plus
is the only Phone that is even worth considering upgrade S9 is the
exact same replica of the S8 that was launched last year except for the camera
and the processor Samsung just slapped the S9
processor and camera onto the S8 and called it they S9 and that
definitely not worth $700 I mean seriously Samsung if you guys are
planning to buy the S9 instead of the S9 plus just don't do it
that brings us to the S9 plus it has the same fast charging same old
wireless charging so nothing exciting there the major improvement is in the
camera section the dual aperture camera is really interesting I have to tell you
samsung has one of the best cameras in the mobile market right now that can
takes awesome low-light pictures and Samsung even let you manually change the
camera aperture but let's face it the only time an average consumer is going
to use this feature is the first time he unbox of the phone and checks if it is
working or not and if you are a professional photographer who wants this
feature do yourself a favor and get a DSLR don't get me wrong camera Improvements
are always welcome as an additional feature and not as a deciding factor to
buy a new phone and then there is bixby with the special key
I wish I could say Bixby has improved a lot in S9 and s9 a plus I guess you
can always wish for something that's never gonna happen
like world peace an option to remap the Bixby button
but deep down we all know that's not going to happen then there is this AR
emoji because you know Apple is the only company that takes stuff from other phone
manufacturers and make it a little better and advertise it as their own
I am just kidding of course Samsung didn't make it any better in
fact the facial tracking is a joke if you have noticed the difference between
using snapchat on an Android phone and an iPhone you will probably notice
the difference between anemoji and AR emoji Apple has created this face
recognition feature built inside the notch they wanted to show off that feature so
they created anemoji but Samsung created aremoji just because Apple
had an emoji so if you don't want a phone that has a gimmicky feature and
that's not even working properly then you should probably ignore the S9
and S9 plus the next upgrade in the S9 and s9 plus is the earpiece
it also acts as a secondary speaker you should probably listen to the sound made
by different phones to notice it here is an example
if you are the kind of guy like me who is always covering the speaker with
his finger you should probably consider buying the S9 plus you could also use a
case on your note 8 or S8 or you know just don't keep your finger on the
speakers so if you want to buy a new Samsung phone just go for S8 or Note 8
they offer better value for your money they even have the same battery
capacity so I'm not sure why anyone would prefer S9 over s8 or note 8 so
unless you really really want that Snapdragon 805 processor
you should probably skip the S9 as always thank you for watching have a
great day bye bye
-------------------------------------------
Avengers Infinity War - Rocket Raccoon & Groot - Hasbro Basic Action Figure Review - Duration: 7:37.
Avengers Infinity War - Rocket Raccoon & Groot - Hasbro Basic Action Figure Review - An unlikely
duo, Rocket Raccoon and Groot blast into intergalactic action to take down the bad guys.
Join the quest to collect the Infinity Stones with Avengers: Infinity War 6-inch scale figures!
These Rocket Raccoon and Groot figures include a Rocket Raccoon-inspired blaster accessory
and an attachable Infinity Stone for movie-inspired battling action!
Collect all Avengers: Infinity War 6-inch-scale figures to collect all of the Infinity Stones!
MARVEL AVENGERS: INFINITY WAR ROCKET RACCOON & GROOT WITH INFINITY STONE
Please Subscribe and Support the channel!! https://www.youtube.com/channel/UC23U4jpP2BAw8uxaH4Zwh8g?sub_confirmation=1
My Links *********
Business Enquiries: Supersorrell@live.co.uk Instagram: https://www.instagram.com/supersorrell
Twitter: https://twitter.com/supersorrell Facebook Page: https://www.facebook.com/supersorrell
Website: http://www.supersorrell.co.uk Ebay: https://www.ebay.co.uk/usr/supersorrell-youtube
Facebook Group - https://www.facebook.com/groups/actionfigurecollectorsuk/
SuperSorrell's Amazon Wishlist *******************************
https://www.amazon.co.uk/registry/wishlist/1O8G4P8JZJOZE/
About Me ********
Toy Reviews, Action Figure Reviews - EVERY SINGLE DAY!!!
- New video uploads 05:00 am + 17:00 pm UK GMT TIME; Marvel Legends, DC Collectibles,
Star Wars Black Series, Elite Series, NECA, McFarlane, Diamond Select & Bandai SH Figuarts.
I Also love audience participation I do poll voting so
you
the viewers, choose the next review!!
Join me for regular Lego Unboxing & Builds, Toy Hauls & Mystery Box videos!
MRS SuperSorrell joins the channel to bring you everything HARRY POTTER and DISNEY
We love visiting WALT DISNEY WORLD and DISNEYLAND PARIS yearly creating memories and vlogs So
join me in my geeky world and smash the subscribe button This is my channel Toy Reviews, Action
Figure Reviews - EVERY SINGLE DAY!!!
- New video uploads 05:00 am + 17:00 pm UK GMT TIME; Marvel Legends, DC Collectibles,
DC Designer Series, Multiverse & Icons, Star Wars Black Series, Elite Series, NECA
Avengers Infinity War - Rocket Raccoon & Groot - Hasbro Basic
Action Figure Review
Let me know your thoughts in the comments below;
#RocketRaccoon #groot #AvengersInfinityWar #Avengers #InfinityWar #marvel #marvelcomics
#MarvelStudios #unboxing #review #hasbro #actionfigure #toys
avengers,infinity war,basic figure,rocket raccoon,groot,action figure,hasbro,unboxing,review,toys,avengers
infinity war basic figures,avengers infinity war basic action figures,avengers infinity
war action figures,avengers infinity war toys,avengers infinity war rocket raccoon and groot,rocket
raccoon and groot,infinity war groot action figure,infinity war groot toy,infinity war
hasbro toys,disney,marvel,supersorrell,infinity stone,MARVEL AVENGERS: INFINITY WAR ROCKET
RACCOON & GROOT WITH INFINITY STONE
-------------------------------------------
Disney Tsum Tsum Series 9 Mystery Pack Blind Bag Review - Duration: 5:30.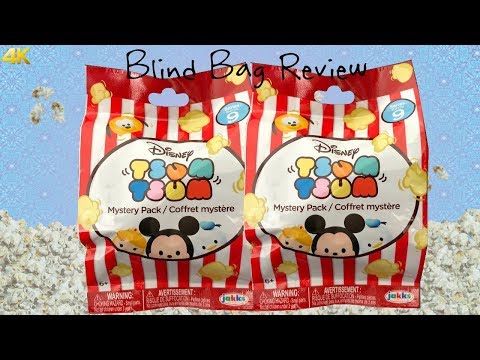
hey everybody today in this video I'll be opening up and reviewing two of these
series nine tsumtsum mystery packs now we know blind bags can be very fun to
collect but the fun can also be short-lived and gimmicky I want to give
an honest review of these series nine tsumtsum blind bags to see if this blind
bag is just a fun throwaway item or if it has some value to keep as a cool
collectible let's go ahead and open these up the first review point that I'm
gonna go over is package design though does it add to the fun and these are
really cute they look like little popcorn bags and on the back you can see
is there's 12 different ones to collect and these ones have working wheels which
is really cool so I'm gonna use the little scissors to open these up because
they don't have a pull tab anywhere and see what the first tsumtsum that I got
and this one looks like a eva one from wall-e looks really cool
Eve not Eva Eve this is really cute little assembly required
go ahead and built this and come back and here it is it looks really cute I
like this one a lot and bag number two
okay this is a Nightmare Before Christmas one doctor whats his name Dr. Finklestein
this one is one with the wheels
yeah there's his little chair and then the tsumtsum sits in it that's really
cute and then you can wheel it around they move okay so next review point is
the package is it a cool collectible for use for display with the toy or is it
a throwaway item these obviously throwaway item next is variety does the
checklist show a good variety of possible toys and range and here's the
checklist for series 9 you see there are a lot of different characters and the
two that I got today we're at dr. Finklestein which is a new one and this
one was a super lucky one and then Eve which is a lucky one
so I got two really different characters which is cool and then there's some more
and then there's the black and white and silver ones so they did a good job
giving you a great variety for series 9
next review point is execution is the actual surprise story a decent quality
and I'm so surprised they keep on coming up with really cute ways to make these
little tsumtsum more and more fun adding the working wheels and then just by
giving them really cute displays it makes them seem brand new even if you
have seen that character in the tsumtsum form before it makes it new and
exciting to collect I think these are awesome quality and based off of my
review points of course I would definitely recommend getting series 9 of
these tsumtsums I think they're still really cute
and still great ideas and my rating from 1 to 10 10 being the best I give these a
10 out of 10 thank you guys so much for watching this review bye
-------------------------------------------
Cookie Run Ovenbreak Whipped Cream Cookie + Pet Review & New Treasure | With Sub - Duration: 19:29.
Welcome to RIC Channel for ovenbreak players and audience from smartphone, PC,Laptop,Tablet,TV&Studio
Finally Devsisters have launch a new Land or new world
From along time ago
Just stay until Land 7
It's been until one year
And now At 27th March 2018.
Finally Devsisters has design a new land. Land 8
Hoorah
Land 8 name :Twisted Maze Groove
There's a rules. What rules? Let's check it out later
To entry Land 8, you must collect 9000 trophies
And that's mean to entry champions league now need 9500 trophies
Allright then
New Cookie
Looks like a girl. We'll find out later Or maybe man
New treasure name X-Tra Hot Turbo Engine
Increase speed and like a shield
And we got 800 crystal for free
Because already reach land 8 Thank you devsisters
I claim my champions league reward first
I intentionally do this
Because my cookie already at max level
So on next time, i will guaranteed to gain new cookie. Hoorah
Welcome to..... It so fast
Scary
Twisted and change
Is this '!' symbol or '?'
I will answer disagree
No way. Why i should join with this not lucid pink ball
No, i dont want
Right side? It's a must choose agree then
Okay then
Forgot something?
Whooops, too fast
There's a rules
There's a fairy jellies appear on the map. Allright we will play it later
But before that, back to the cookie. Try open pet first, because i just have one key supreme
ZONK
Let's open that three keys
And a new treasure Allright, i try draw it
What, dont get anymore? I already use special treasure draw here
I just get the previous treasure (Goblet)
Really really nonsense
Draw one more time
What ZONK again? It's a lie
Come on
ZONK
And i must hope for this treasure choice coupon
Allright
Oh yeah, i try to use special pet egg. Come on, gain the new pet please
Got Tea Cup Oh no, the last one
Nice
Level Up Cookie, Pet & Make Magic Candy
Now we go to cookie trial
And i hope with one play, i can reach 22M Score
Brilliant. I can get both (Cookie and Pet) special supreme key
So, i can draw one more time later
Allright. Got it. Nice
Draw cookie, pet and treasure again. And Level up them
Allright guys, i will review new cookie and pet now
Cookie lvl 15. But this time the pet is only lvl 8
And the pet, it can revive the cookie
At the trial, i had panic because i'm afraid i fail to clear with one play
And the pet function is revive the cookie with several energy. Depends the level
How about the cookie?
He will ballet dancing when the bar is full
Like the picture i guess
And magic candy effect
When the cookie finish dancing, there are several bouquets
Let's test on this land. Land 7
Lets test with the new treasure
I think this treasure almost same with lollipop skate right?
Same right?
Looks like lollipop skate will go down later
Allright then
Treasure....
This one
The World is full of beauty. What???
That's the cookie skill
Ballet dancing
That's from magic candy effect. There will appear several bouquets
If magic candy already max level, it can gain more score bonus
And that's from new treasure effect Like a shield
If possible, don't get crash
If get crash, the speed become normal. And will increase again if the treasure full recharge
The new treasure need several times to recharge
The new treasure dont make addtional points
Like a fire shield effect on the new treasure
For increase speed
Dancing again
COLLECT THAT BOUQUETS
If possible, collect all of them
His foot really really thin
Really really agile
Ballet dancing again. And spin arround
This also a special cookie
Because this cookie is not from LCR
No, it (bouquets) falling down
From now on. Land 7 can't use for trophy race again T.T
Really really sad right? T___T
Almost get crash
The dance platform is big
Oh no, i get fall
One more skill please......
Revive again the cookie
Need more time again to dance after the skill is active
This should be last performace
Can he reach the last bonus?
Still can
Can he reach 50M Score?
Oo. it almost there
49M Score
Almost 50M
This cookie not bad at all
Looks like almost same with cherry blossom cookie right?
Good
This cookie is good
Look, he is male
Male dance ballet? It's funny
So guys, have you try this cookie yet?
Whipped Cream Cookie, with the thick cream :v
Allright guys that's my video tonight, thank you for watching
If you like = Like it If you dislike = Dislike It
Comment, share & don't forget subscribe for more videos
Free subscribe, free of charge See you in next video
-------------------------------------------
Shopkins Shoppie Makaella Wish Doll Review - Duration: 4:35.
hey everybody today in this video I'll be doing a review of the shopkin
shoppies Makaella wish here's the back of the box you can read more about
Makaella wish see her artwork this box kind is ripped in the back so it's not
perfect her two exclusive shopkins she comes with are
Sally-Brate cupcake and Tooty Party blower here's a look at the accessories
that Makaella comes with her VIP card which has the shopkin app code on the
back you have her comb which is a little cupcake with a candle in it here are her
two exclusive shopkins they're really cute they have matching colors the
sprinkles up-close look at Makaella's headband you have a white headband with
a blue bow some pink ribbons coming off of it and then there is a cake with a
candle on top here's the look at her face up close she has pink and yellow
eyes some very light blue eyeshadow pink blushing on her cheeks then she has an
open mouth expression with bright pink lipstick and blonde yellow eyebrows her
hair she has two long bangs in the front and these are really gelled and stiff so
they're separate from the rest of her hair which is blonde and then some
orange and pink streaks in her hair which has a very straight cut to the
bottom and just straight not much of a style just loose going down into her
outfit she has a blue necklace with a pink heart on it that looks like it
connects to her dress the top of it is molded on pink with white
ruffles and then you have the fabric part of her dress has little rainbow
ribbons and it looks like confetti and party streamers on the bottom part of
her skirt and her little shoes are pink some white whipping cream on the front
part and then blue ribbons around her ankles that tied into bows in the back
and then she has a clear shoppie stand which connect through the shoes okay so
my overall rating for Makaella from one to ten ten being the best I would
give her a seven out of ten uh she's really cute I like her outfit she looks
bright and colorful and like she belongs at a party the only thing on her that
I'm not too happy with is the hair I don't like this really gelled bang part
it doesn't feel nice and it's crunchy and I don't think it looks as nice as it
could and then the rest of her hair has this weird crease to it it doesn't look
as nice as regular shoppies normal hairdo hair quality is it's just kind of
boring I like the colors but overall I think it could have been way better
there's a little bit of a gaping there you can see the bald spot because of the
way they did the bangs I think they could have had separate bangs towards
the front like this without having so much gel and having it so stiff and hard
other than that I think she goes well with her theme like make a wish and then
her shopkins go well with her the colors and what they are like a little party
her and then a little cupcake she looks really cute thank you guys so much for
watching this review bye
-------------------------------------------
Sega Genesis Flashback (review) - How to add more games - Duration: 10:37.
WHAT IS UP GUYS?
WELCOME BACK TO ANOTHER VIDEO
MY NAME IS SPARCKMAN
AND I NOTICED THAT WE'RE BACK FROM A LONG BREAK
AND YA WE'RE GOING TO CONTINUE THE USUAL
WHICH IS GAMING
NOW SEGA HAS RELEASED A HD COPY OF
THE SEGA GENESIS
YA SO TODAY I'M GOING TO SHOW YOU HOW TO
ADD MORE GAMES TO YOUR SEGA GENESIS
FLASHBACK
SOME PEOPLE KNOW THIS AS A SEGA GENESIS MEGA DRIVE
NOW THIS IS GOING TO BE A QUICK GUIDE
FOR YOU TO ADD MORE GAMES TO YOUR SEGA GENESIS
BUT BE AWARE THAT YOU CAN EASILY BREAK
YOUR SEGA GENESIS AND YOU MIGHT JUST HAVE TO GO GET ANOTHER ONE
ALRIGHT, SO THAT'S MY DISCLAIMER
SO I'M NOT RESPONSABLE IF YOU BREAK YOUR SEGA GENESIS
BUT IT WORKED FINE FOR ME
SO HOPEFULLY YOU'RE NOT GOING TO HAVE ANY PROBLEMS
OKAY SO THE FIRST THING YOU'RE GOING TO DO IS
YOU'RE GOING TO REMOVE ALL THESE SCREWS
THERE'S ONE IN THE MIDDLE
WHICH WILL VOID YOUR WARRANTY
SO BE AWARE OF THAT
AND THIS IS ALL IT IS
IT'S JUST A BOARD
OKAY SO HERE IS THE USB PORT
WE'RE GOING TO USE TO CONNECT TO YOUR COMPUTER
USING THIS KIND OF USB
IT'S THE SMALL CHUNKY ONE
THAT CAME WITH YOUR PS3
CONTROLLER
NOT THE FLAT ONE
BUT THIS ONE HERE
AND THIS IS THE ONE THAT GOES TO THE COMPUTER
OKAY
SO I'M GOING TO DO THAT RIGHT NOW
AND WHEN YOU FINISH UNSCREWING THIS
WE ARE GOING TO CONTINUE
SO I'M GOING TO PAUSE THE VIDEO
AND I'M GOING TO CONNECT MY SEGA GENESIS
TO MY COMPUTER
ALRIGHT SO NOW THAT YOU HAVE CONNECTED
YOUR SEGA GENESIS TO YOUR COMPUTER
IT IS GOING TO SHOW UP AS A CELL PHONE
THAT'S BECAUSE THIS RUNS ON ANDROID
YOU CAN SEE DOWNLOADS
RING TONES
GAMES
AND PICTURES
OKAY SO LET'S CLOSE THIS
NOW UNDER THE DESCRIPTION BELOW
YOU CAN FIND THESE FILES
I FOUND THESE FILES FROM ANOTHER YOUTUBER
SO GO AHEAD AND DOWNLOAD THE ADV SETUP
SO LET'S INSTALL IT
THIS WILL TAKE A COUPLE OF SECONDS
JUST SAY YES TO EVERYTHING
THERE WE GO
AND THAT'S DONE
NOW IF YOU HAVE ANY PROBLEMS
DOWNLOAD THE ADV DRIVER
MINE SEEMS TO BE WORKING
CLOSE THIS
NOW I'M GOING TO OPEN THIS IN NOTEPAD +
YOU DON'T HAVE TO BUT I LIKE TO USE NOTEPAD +
YA SO LET'S MAKE A NEW FOLDER
AND LET'S CALL THIS GAMES
OOPS
THERE WE GO
AND LET ME JUST MINIMIZE THIS HERE
SO I'M GOING TO HOLD SHIFT
AND RIGHT CLICK
I'M GOING TO OPEN THE COMMAND LINE
AND LET'S OPEN OUR FIRST COMMAND
WHICH IS ADB DEVICES
PASTE THIS HERE
PRESS ENTER
AND YOU SHOULD SEE YOUR SEGA GENESIS AS A DEVICE
NOW FOR THE SECOND STEP
WE'RE GOING TO
SAVE OUR SYSTEM INI
SO LET'S RUN THIS
AND THERE IS OUR SYSTEM INI FILE
LET ME JUST BACK THAT UP
JUST IN CASE
NOW THIS COMMAND ALLOWS MODIFICATIONS TO THE NEW SYSTEM
SO YOU HAVE TO BE CAREFUL
I'M NOT RESPONSIBLE IF YOU BREAK YOUR SEGA GENESIS
SO LET'S OPEN UP THE SEGA GENESIS
THAT'S OPEN NOW
LET' SEE THIS MAKES A BACKUP
JUST IN CASE
YOU NEVER KNOW
THERE IS OUR BACKUP
NOW STEP FIVE
THIS CREATES A LINK
FROM THE ORIGINAL iNI TO THE NEW INI FILE
THAT YOU WERE GOING TO MAKE
ACTUALLY WE ALREADY DID
HERE WE GO
NUMBER SIX
WE ARE GOING TO SET THIS TO READ ONLY
THERE WE GO
SO NOW WE'RE READY
NOW FOR THE NEXT STEP
WE'RE GOING TO NEED ROMS AND IMAGES
WHICH YOU CAN FIND ANYWHERE ON LE INTERNET
I GOT A FOLDER HERE WITH IMAGES AND GAMES
THERES ARE BIN FILES
SO I'M NOT GOING TO USE BATMAN
SO LET ME JUST DELETE THAT THERE
WHERE'S BATMAN
ALRIGHT, LET ME SEE
DELETE THAT
DELETE MARIO
OKAY HERE WE GO
WE GOT A BUGS LIFE
ALRIGHT, LET ME OPEN THIS IN LE PHOTOSHOP
YOU DON'T HAVE TO USE PHOTOSHOP
YOU CAN USE PAINT
I JUST WANT TO SHOW YOU THE IMAGE SIZE
OKAY, SO THIS HAS TO BE 214X300
OKAY, OTHER WISE IT'S NOT GOING TO WORK
SO LET'S SAVE THIS A S THE PNG.
IT'S ALREADY A PNG
SO SAVE IT
NOW THIS ROM IS CALLED
A BUGS LIFE .BIN
AND THIS SHOULD BE CALLED A BUGS LIFE.BIN.PNG
OKAY, MAKE SURE THAT THE ROM HAS THE SAME NAME AS THE IMAGE
ALRIGHT, OTHERWISE IT'S NOT GOING TO WORK
SO LET ME COPY ALL THIS
AND I'M GOING TO PLAY SOME UNDERGAMES
LET'S BEGIN WITH A BUGS LIFE
YOU CAN FIND THESE ROMS ANYWHERE ON THE INTERNET
I ALREADY OWN THESE GAMES
SO I'M ENTITLED TO USE THEM ON MY SYSTEM
OKAY, SO LET ME SCROLL DOWN
BACK TO OUR ORIGINAL FILE
SCROLL DOWN
LET'S JUST COPY THIS
THE OTHER YOUTUBER WAS NICE ENOUGH TO CREATE THIS TEMPLATE FOR US
I WILL LEAVE A LINK IN THE DESCRIPTION BELOW
FOR HIS YOUTUBE CHANNEL
HE'S A PRETTY EASY GUY TO FOLLOW ACTUALLY
SO LET ME JUST COPY THE NAME OF
THE FIRST GAME
PASTE IT HERE
LET ME JUST TAKE OUT THE BIN PART
PASTE IT THERE
NOW IF YOU WANTED A DESCRIPTION YOU CAN GIVE IT A DESCRIPTION
IF YOU WANTED TO
I'M JUST GOING TO SAY A BUGS LIFE GAME
FUN STUFF
YOU CAN ADD A DESCRIPTION OF WHAT THE BUTTONS DO
OKAY, BUT I'M NOT GOING TO BOTHER WITH THAT NOW
COPY THIS
MAKE ANOTHER ENTRY
THIS ONE'S GOING TO BE FOR ANIMANIACS
COPY IT
COPY THE PATH
GIVE IT A DESCRIPTION
SUPER FUN GAME
ONE MORE
THIS ONE IS GOING TO BE FOR MONSTERS
REAL MONSTERS
AGAIN BE SUPER CAREFUL WITH THE NAMING
UPERCASES AND ALL THAT KIND OF STUFF
IT'S BEST JUST TO COPY AND PASTE THE FILE NAME
I'M GOING TO GIVE IT A DESCRIPTION
SUPER SCARY GAME
SAVE IT
AND WE ARE READY
CLOSE ALL THESE STUFF
CLOSE THIS HERE
HERE IS MY GAMES FOLDER
MAKE SURE YOU HAVE YOUR INI FILE IN HERE
ET'S COPY THIS
TO OUR SEGA SYSTEM
PASTE IT ANYWHERE ON THE ROOT
THERE WE GO
THERE'S THE INI FILE
AND THE THREE PICTURES
WITH THE THREE ROMS
OKAY, SO NOW LET'S HAVE A LOOK AT OUR SYSTEM
HERE WE GO
SO I'M GOING TO REBOOT THIS
IT'S BACK ONLINE AND YOU CAN SEE THAT THIS WORKS FINE
LET ME JUST TRY A BUGS LIFE
AND IT WORKS FINE
OKAY SO YOU CAN SEE THAT THIS IS EXTREMELY SIMPLE
AGAIN, SO DON'T FORGET THAT YOU CAN'T DOWNLOAD GAMES THAT YOU DON'T OWN
ALRIGHT, SO MAKE SURE YOU OWN THE ACTUAL CARTARIDGE
IF YOU'RE NOT SUBSCRIBED MAKE SURE YOU HIT THAT SUBSCRIBE BUTTON
DOWN BLOW
AND SMACK THE LIKE BUTTON
THANKS FOR WATCHING
AND I WILL SEE YOU IN THE NEXT VIDEO
BYE NOW
-------------------------------------------
Ford F350 2018 | 2018 Ford F-350 Super Duty Diesel Review And Specs - Duration: 3:53. For more infomation >> Ford F350 2018 | 2018 Ford F-350 Super Duty Diesel Review And Specs - Duration: 3:53.
 -------------------------------------------
2015-2018 Mustang BMR Polyurethane Differential Bushing Lockout Kit Review & Install - Duration: 4:33.
Hey guys.
This is the BMR Polyurethane Differential Bushing Lockout Kit for the 2015 and newer
S550 Mustang.
BMR says that this kits gives the lowest increase in NVH, or noise vibration and harshness,
of all of the BMR differential mounting solutions, so you're gonna wanna check this kit out if
you're looking for a non-permanent way to help stop some deflection and movement in
the differential, without adding a lot of NVH.
This kit installs over the factory bushings, and it's one of the most affordable options
when it comes to IRS components.
The install isn't too technical, but you do need to make room for these, so you are gonna
need to loosen up the cradle some, but we'll talk about that in more detail later.
The basic description of this kit is that installs over the factor rubber differential
bushings and gives them a more solid foundation.
The bushings in this kit are made from polyurethane, which is stiffer than rubber, so they reduce
the deflection that you get with the soft and flexible factory rubber bushings, and
they fill up more of that space between the bolt and the bushing.
So they tighten things up a little bit.
They're made to help stop the differential from moving, which therefore helps with wheel
hop and handling stability.
And because this kit retains the use of the factory rubber bushings, it doesn't add a
tonne of NVH.
BMR does say that this kit is the kit that adds the least amount of NVH when it comes
to all of their diff mounting solutions.
But customers have noticed a little bit of noise with this kit installed on performance
packed cars with the 373 rear gears.
Of course, you have to expect some level of increased noise with a kit like this, but
the determination of too much noise is gonna be completely up to you and you personal preferences.
With this kit you'll get four bushings, four spacers, eight bolts, six washers and lock
washers and two nuts.
That's enough to allow you to assemble and put the inserts on either side of the stock
differential bolt and bushing set-up.
The aluminum spacers and poly bushings will be assembled with a washer and lock washer
for one side and a bolt, and two washers and a bolt would be for the other side.
As far as price goes, you're looking at spending about $50 for this kit.
That makes is one of the most affordable differential mounting kits available.
Now you do have a lot of options when it comes to IRS components for the S550 though.
You can go a lot of different ways.
You can do a bushing lockout kit like this one, or a cradle bushing lockout kit.
You can completely replace your diff bushings with inserts, or you can do IRS sub-frame
supporters.
You can do a differential lockout kit too.
You're just gonna need to research and figure out what's the best option for you and your
application, and what exactly you're trying to do.
A lot of these options will add some noise and create a rough ride quality, but they're
also gonna help you out a lot on the track or for performance driving, so you'll need
to decide exactly what you're looking for.
When is comes to the install, you can expect to spend about an hour getting this kit installed.
You'll just need some basic hand tools and a way to get the car in the air.
You'll lift the car and use a jack to lift the rear diff.
You wanna support the entire cradle and the diff with a jack.
You're gonna loosen the two rear cradle bolts, but don't totally remove them yet.
Remove the two front diff bolts.
Then you can pull the two small bolts on the front cradle support brackets and remove the
mounting bolts.
Then you'll lower the front of the cradle down until you can get to the front diff bushings.
You'll push the aluminum spacers into the centers of the poly bushings.
Assemble the 35 millimeter bolt, the larger stainless washer, lock washer, and one of
the poly bushings, and install it as an assembly into the front of the front diff bushings.
You'll just need to turn the poly bushings until it lines with the rubber bushing, and
thread the assembly into the front diff bushing.
You'll do this for both of the front bushings.
Then you'll need to assemble the 65 millimeter bolt, the gold washer and lock washer, and
thread it into the rear of the front diff bushing.
You'll then tighten all four bolts.
Then you can move onto the rear bolts.
The 100 millimeter bolt, large stainless washer, lock washer, and a poly bushing can be assembled
and threaded into the rear diff bushing, just like you did with the front.
Once you have the rears in place, you can tighten them down.
Next you'll lift the cradle back up to the frame and insert the front cradle bolts and
cradle supports.
Tighten down all of your bolts and you'll be all done.
That's gonna wrap things up for the BMR Polyurethane Differential Bushing Lockout Kit for the 2015
and newer S550 Mustang, but you can check it out more online right here at americanmuscle.com.
-------------------------------------------
Audi RS4 2018 | 2018 Audi RS4 Avant Review - Interior Exterior - Duration: 4:10. For more infomation >> Audi RS4 2018 | 2018 Audi RS4 Avant Review - Interior Exterior - Duration: 4:10.
 -------------------------------------------
⭐ SHERPA THROW BLANKETS - Honeymoon Home Fashions (Warm, Super-Soft) REVIEW 👈 - Duration: 4:57.
hey guys so I have some new Sherpa blankets to show you today these are so
warm and cozy
so these blankets are made by Honeymoon Home fashion and these are some ultra
thick Sherpa throw blankets and if you can even see this these are so soft and
what's so special about this fabric is that it's made to look like it's fleece
from sheep this isn't actually any sheep fur but this is made from a polyester
and it's often used as a type of blanket and already I want to wear one of these
because it's cold and these look like a great suitable fix to that on the edging
there is suede to add an extra you know into this blanket to make it even softer
and these blankets have a very high-end look you know you could put this in your
living room and add a nice little you know pillow to it and make it look
really really cozy unlike fleece this is a lot more durable this holds up a lot
longer especially if you've pets or you need a washing lot like washing I'll
show you what the instructions are at least I'll read them out you machine
wash cold separately you have to use the gentle cycle don't bleach tumble dry low
and do not iron keep that in mind when you want to clean this and they come in
two colors you have the gray right here and you have the nice khaki as you can
tell is your nice big fluffy I came to fit this one full screen so
big see and then you flip it over it's even better
and it's just so nice and comfortable and cozy and you feel like you're
hugging a bear looks comfortable yes it's very very common very warm to this
this is nice you can feel it on both sides it's very
high-end and feels high-end too so here is a closer look at the blanket as you
could tell it's so it's soft fluffy you know and it's just so so soft I don't
have a blanky like this so I really like this a lot so as you can tell this is
reversible so you get some double-sided soft fuzzy warm that you don't have to
worry about having to wash one because you messed it up or something like that
you know it's great it's handy this blanket measures 50 inches by 70 inches
it's very thick but it's also lightweight which makes it easy to carry
around and bring with you anywhere you need to have something warm and cozy
like this now this is wrinkle resistant as well and that's nice because this
will always keep it's nice fluffy sheep like appearance and it's not as exactly
thin like a flannel or just your average suede blanket you know a fleece blanket
if anything nice fluffy thick warm I'm already feeling a lot warmer than I was
earlier there's so many uses for this you could take this off for a nice walk
have it wrapped around you take it camping if you'd probably take it on a
beach at night too if you wanted or you keep it on your bed in the living room
there's so many places you could have your blanket and be warm
at the same time so please check the description section below for more
information on this honeymoon like it and please make sure you subscribe to
this channel like this video and keep your comments coming thanks for watching
you
Không có nhận xét nào:
Đăng nhận xét