maggam work
-------------------------------------------
Simple bridal mehandi designs for full hands | latest wedding Arabic Mehndi Designs front and back - Duration: 5:07.
Copy rights
-------------------------------------------
4 Simple Exercises To Flatten You Stomach in 2 Weeks - Duration: 4:29.
-------------------------------------------
Anna Jones' Simple Suppers | One-Pan Genovese-Style Pasta Recipe | Food Honestly | The Pool - Duration: 2:30.
Hi, I'm Anna Jones, and this is the first of my series of Simple Suppers for The
Pool. My April recipe is a one-pan Genovese pasta. So, the sauce, the pasta,
everything is done in the pan. There's asparagus, new potatoes, basil, all
those fresh, lovely spring flavours.
So, first find a shallow pan with a lid,
put it on your hob, and put the pasta in. Snap the woody bottoms off your
asparagus, cut the stems of the asparagus into little 1/2 centimetre coins,
keeping the tips intact. Keep the tips to one side for later and throw the coins
into the pan with the pasta. Finely slice the cooked potatoes and add them
to the pan. Peel and finely slice your garlic, and add this to the pan along
with the green beans. Use a fine grater to grate the zest of both lemons into
the pan, and add a teaspoon of sea salt and 100mls of olive oil. Next, add
a litre of boiling water from the kettle, put the lid onto your pan, turn the heat
on to maximum and bring it to the boil. As soon as it comes to the boil, remove
the lid and simmer on a high heat for 8 minutes, turning the pasta with a pair of
tongs every 30 seconds or so. Once the pastas had eight minutes, stir
through the asparagus tips and tear over the basil. Simmer everything for a final
two minutes. Once almost all the water has evaporated, take the pan off the heat
and leave it to sit for a few minutes so that the pasta can absorb the last bit
of the water and form a lovely, creamy, lemony sauce. Twirl the pasta into four
bowls and top with a final grating of parmesan.
I hope you enjoyed this recipe. For more videos from The Pool, please just
click Subscribe.
-------------------------------------------
DIY Room Decor 2018! Top 10 Simple DIY Crafts Room Decorating Ideas for Teenagers - Duration: 11:18.
Top 10 Simple DIY Crafts Room Decorating Ideas for Teenagers
-------------------------------------------
#272 easy rangoli designs with 3X3 dots|beautiful padi kolam|chukkala|latest simple geethala muggulu - Duration: 3:42.
Daily Rangoli Designs
-------------------------------------------
RANGOLI WITH COLOURS - 7x4 LATEST SIMPLE, EASY AND QUICK RANGOLI DESIGN WITH COLOURS - Duration: 4:50.
SIMPLE RANGOLI DESIGNS
RANGOLI WITH COLOURS
7x4 LATEST SIMPLE, EASY AND QUICK RANGOLI DESIGN WITH COLOURS
-------------------------------------------
Simple rangoli designs with 13X1 dots | flower rangoli designs | simple muggulu | telugu muggulu - Duration: 11:00.
Simple rangoli designs with 13X1 dot
-------------------------------------------
Explain Everything: How To Make a Simple Video - Duration: 1:34.
[MUSIC]
Make a simple video to explain anything with Explain Everything.
Start with the plan of what you're gonna say in a new Explain Everything project.
We got a bit of a head start.
Once you're ready, add text and images from your iPad to illustrate your concept.
Record just your audio, don't worry about the video yet.
Pause when you're done.
Now open the timeline and toggle the lock closed next to the audio recording.
This allows you to record new video over your existing audio.
Move the play head to the front of the timeline to start recording video.
Press record and then select overwrite to record new video to accompany the audio.
Interact with images and the screen to help tell your story.
Use two fingers to resize and move images.
Zoom and resize the entire screen to take advantage of the infinite canvas.
You can use the pen tool to annotate and emphasize.
Once you're done, use the timeline to preview your progress and
re-record as needed using the play head.
When you've perfected your video, share it with the world.
Hit share and then video.
Choose to save your video to your iPad on Buckeye Box, or
share your explanation with your instructor or classmate directly.
Now that's how to explain anything with Explain Everything.
[MUSIC]
-------------------------------------------
How to make a Simple Lace Top without a Pattern //DIY - Duration: 3:31.
in this video I'll show you how I made this simple top inspired by a tutorial i
watched by Cynthia a she makes beautiful clothes here on YouTube as well I'll
link her video in the description below so you can check it out hers is actually
longer and more detailed. so take your fabric and fold it once then once again
go down around four inches and mark then go to the side another four inches. join
the points with a curve that's the front neckline measure out 16 or so inches and
Mark with a diagonal line like I'm doing here. measure from your shoulder to your
waist and Mark. Draw a straight line at that point
now join with a curve from your desired full length to the sides. take your waist
measurement divide it by four and add one inch mark that point and then mark out
like I'm doing to the side go down around one inch now go up at the
neckline one inch higher for the back neckline and then join with a curve. then
cut out
cut out this path carefully as well
separate the back and front so that you can cut the Front neckline. now join in
the shoulder seams. afterwards fold in the neckline and stitch
join these points as well. here making a belt that sixty inches long and five
inches wide I'll then fold it and pin then stitch it
and later on turn it to the right side and iron
hem the top at the arms and at the bottom. take the belt and tie it at the
waist. that is the final look. thanks so much for watching this video please
subscribe if you haven't and I'll see you in the next video. also like the video if
you do. Bye
-------------------------------------------
Simple leg lock series - Duration: 6:11.
What's going to happen is I'm going to trap this
Gonna fall back on it
This foot is going to come right here, and this foot is going to block the hip
This is keeping him from coming all the way into me
And this one is here
Toes to the floor so he can't jump over
The first thing we are going to attack is the straight ankle lock
What I'm going to do here is
Press on that shin. Come back here.
And then
Grab my own wrist here
Pinch your legs
Come off the elbow
Everything is going to go to the floor here
Here then
Here like a kimura grip
Foot on the hip
This one on top of the heel to lock him in
Pinch
Everything right to the floor
Guard break
Just going to fall back on it
This foot is going to come up
This foot is going to come here
Pressure on the leg here is what they call loading the pressure
Then here. It's already tight
Then I want to collapse on my elbows
There we go
That's it
A lot of you are having trouble here
One thing is, make sure you get all the way back
On that ankle
This little bony part
Right under the heel
So if you can't get here, and get it
What you can also do is
Take that guillotine grip
Go to third base on yourself. Give yourself a little squeeze
Then hip into it that way just like a guillotine
What he can do here is what I call a weak boot
So now what I'm going to do here is go for the heel hook
So now I'm going to collapse
Get my butt up
This exposes the heel
I'm getting my wrist right in the heel here
Now this is where we gotta be careful
We're here, lift up, and now we crunch
And hip into his knee
We're here trying to get it [the ankle lock], he puts on his boot
Oh no! Oh no!
Ankle
Hip in
So you're crunching in
Then just twisting, and hipping in at the same time
So basically what you're trying to do is hold his knee steady
You want his knee to be still and then what we're doing is taking
that heel and twisting it at the knee
So with the strong boot
There's a few things we can do here depending on what he's giving you
Sometimes what I will do here is
Now I'm going to grab for this leg here
I'm gonna drop
Kick
Come here
Now
I have this [heel hook] here
Same deal. Pinch
Lean back
So I'm going to fall back
Once again...carefully
That's all it is
He's got on a boot
He's not letting me do anything here
Grab the foot here
Kick to make the space and swing this leg through
Lock that down
Then go straight to this
Heel
Alright we break [the guard], and fall back
Right here
There's gonna come a point
Where you roll with a guy and he's not gonna let you do this
He feels you reach for this and he's going to kick that away
So now what we do
Take the turn
I come here
I want to bring this knee as close as I can to the floor
It's 50/50 basically but my
Knee is to the floor I have more options than he does
Same deal
Reach back
Now this
Wing
Wing
Right over the toes
Expose that heel and grip
We're here
I reach and he says no
Turn [you hips]
Figure four
Wing and finish
Going to grab
He says no
Leaving this
Open space here. I'm going to turn
Figure four
My feet are hidden
My knees cleared his hip line
So even if he tried something
It's not going to do anything
-------------------------------------------
Simple Ideas for Adjusting Patient Education Based on Patient Needs - Duration: 1:50.
Hi.
I'm Lori Boyer, and welcome to SolutionTeach: Patient Education.
Today we're talking about the importance of targeting your education to individual
patients.
Listen to this true story for a minute, and don't worry, the names have been changed!
A woman named Jill went to the doctor.
The nurse noticed that she was taking birth control, and asked her a little bit about
when she takes them.
Jill responded that some days she takes three pills and some days she doesn't take any.
The nurse, a little confused at this point, asked Jill how the doctor had told her to
take them.
Jill explained, "Well, he said the pills were to keep me from getting pregnant
when I have sex, so I take them anytime I have sex."
You can see the problem.
Part of the issue here was that Jill only read at a 2nd grade level, and she's not
alone.
Did you know that more than 50% of US adults have literacy problems?
To help patients who don't have the best reading skills, it's a great idea to have
visual aids or hands-on activities available for instruction, and not just pamphlets.
It's important that you keep in mind the physical, mental or emotional challenges of
each specific patient as well as their age, cultural beliefs, and their experience with
the healthcare world.
Each of these elements may change the way you educate that patient.
If you want some other tips on how to improve your communication with your patients, check
out the link in the description.
And don't forget to join us next time as we are going to be discussing ways to find
out what your patients already know.
-------------------------------------------
OVM Financial Shows Us How Simple it is to Renovate or Update a Living Space - Duration: 3:33.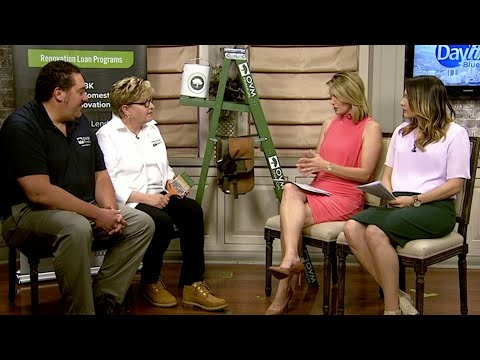 For more infomation >> OVM Financial Shows Us How Simple it is to Renovate or Update a Living Space - Duration: 3:33.
 -------------------------------------------
Remove Unwanted hair permanently with this simple home remedy (no need for waxing or shaving) - Duration: 3:10.
On the one hand you dream of a smooth and silky skin without hair permanently on the other hand wax and shaving have many
Disadvantages and only give a temporary result if this is your case check out the solution in this article
Body care is a priority for women as they are constantly looking for beauty and especially because their bodies are
Perfect and meet the standards of aesthetics and beauty
Yet among the topics that are really annoying for them, there is the problem of excessive hair
The hair or hair system is the set of more or less spicy hair covering the whole body except the soles of the feet
the palms of the hands and the angles
Depending on their location they have a role of protecting heat called aura mists ferric dust but also
maintaining hydration
two tablespoons tanika powder
three tablespoons safflower oil
in a container
incorporate both ingredients
Depending on the area to be depilated
You can reduce or increase the quantities by making sure to put more oil than powder then mix the preparation
Until a homogeneous paste is obtained
First first wax the area with wax or epilator and then apply the paste to the shaved area
massaging regularly for five minutes leave for two hours or more then rinse with warm water
This trick is to be used every day for several months in order to obtain the expected
results in daily use
Simply apply it to the desired area
However as soon as the hair regrows repeat the entire
Operation that is to say starting with the epilate area of your choice
depending on the hair illness of each
Results will be visible from the first weeks
Tanaka powder is a yellow product obtained from the antlers of the Tanaka tree it is from Bulma
Its action on the hair consists in the weakening of its root. Thanks to a protein that it contains
In addition it is an antiseptic product also used to treat acne
purify the skin and protect against sunburn
Safflower oil is a good skin moisturizer because it contains vitamin E
Which contributes to its last disappea and fight against premature aging? It is more nourishing and restorative
if you liked the video give it a thumbs up and share it with your friends if
You want more tips and videos subscribe to the channel?
Không có nhận xét nào:
Đăng nhận xét